Due to a ransomware attack, the wiki was reverted to a July 2022 version. . We apologize for the lack of a more recent valid backup.
...
Obtain the IP address of the tutorial cell on from your instructor and setup a PPTP VPN connection using onos as a user and onos as password. The method to this will vary depending on the operating system of the developer machine. The example below shows the setup on OS/X:
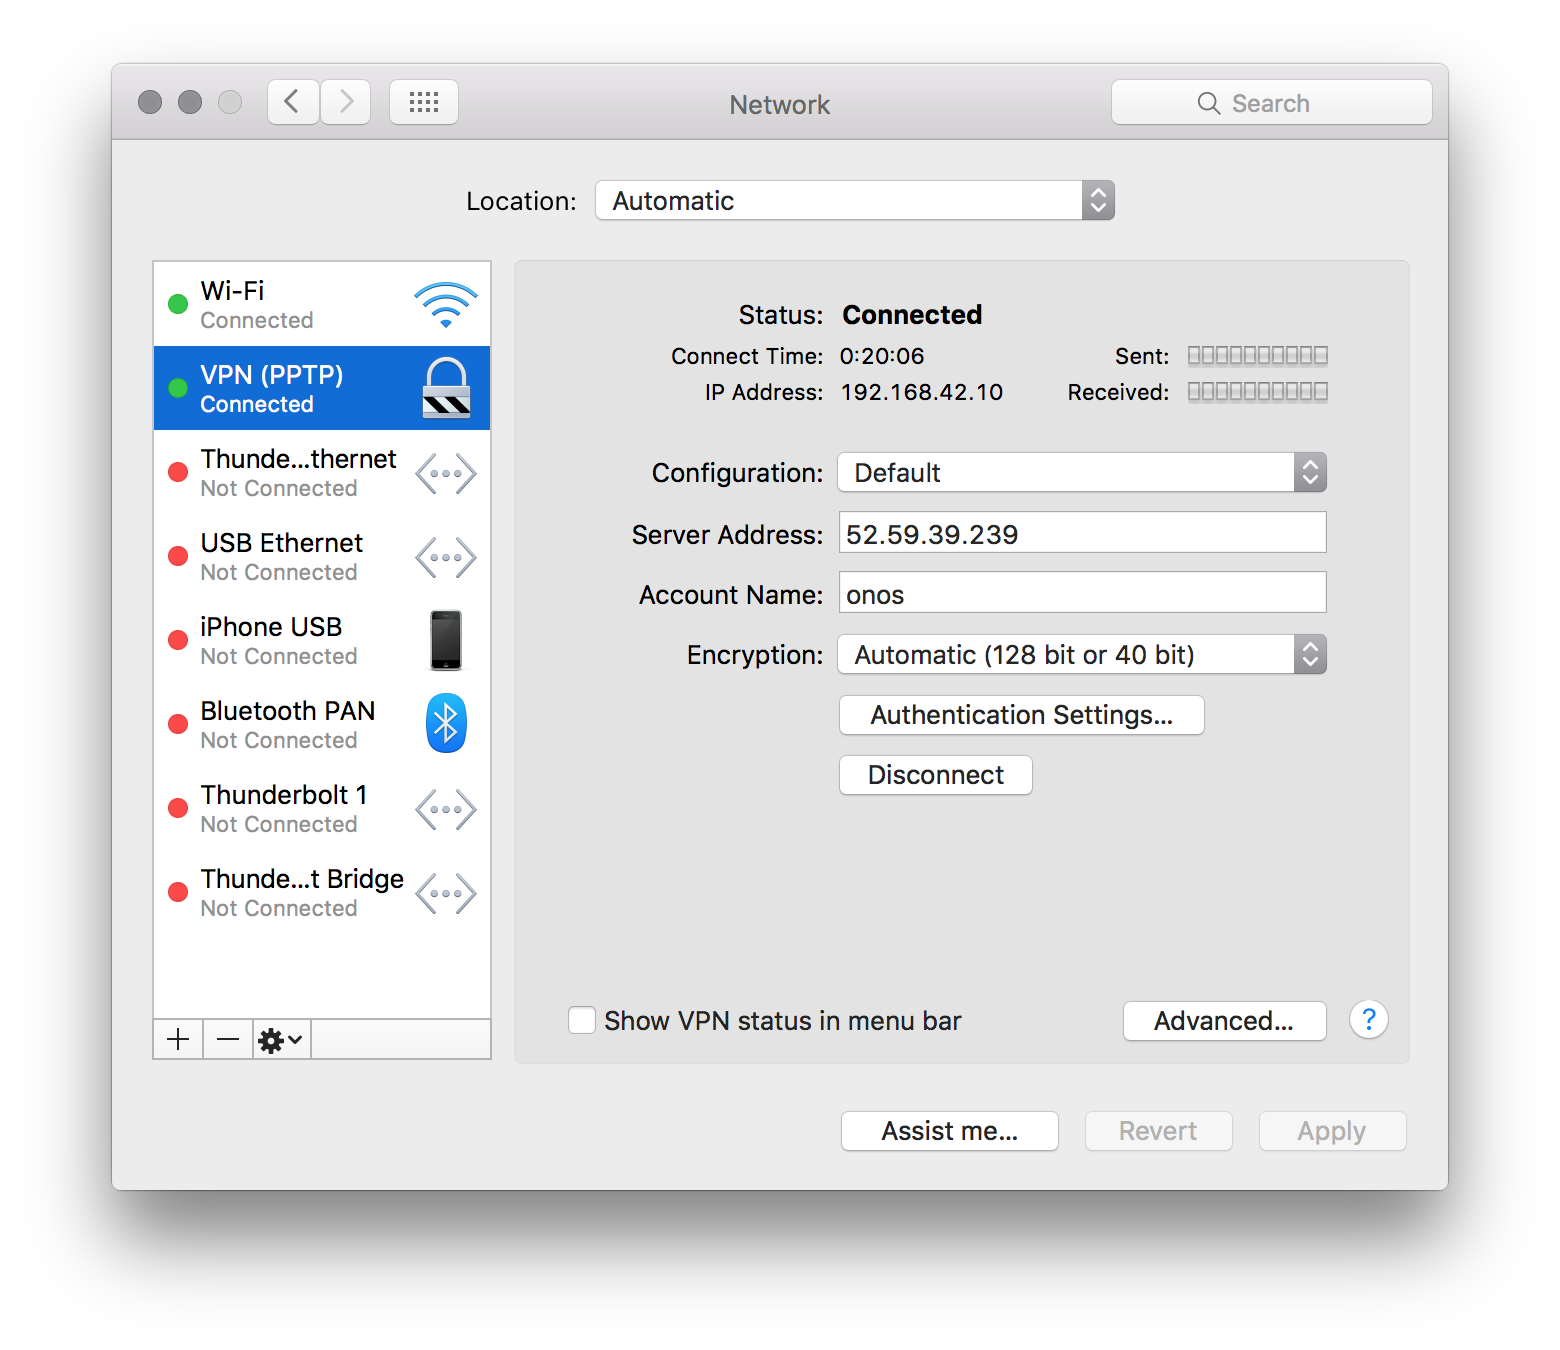
Then connect to the ONOS Cluster VPN.
...
We have downloaded some starter code in the ~/onos-byon directory. It contains a root pom.xml file for the project, as well as a initial implementation of the CLI bundle. We can start by importing the entire project into IntelliJ.
Before we fetch stuff from git, run the following to make git happy.
...
.
...
Before we start, make sure you have the latest version of the template code by running:
...
First start IntelliJ by double clicking on the IntelliJ icon on your desktop. When you get prompted with the following window.
...
| Code Block |
|---|
onos@onos-tutorial:~/onos-byon$ mci [INFO] Scanning for projects... ... [INFO] byon .............................................. SUCCESS [1.104s] [INFO] ------------------------------------------------------------------------ [INFO] BUILD SUCCESS [INFO] ------------------------------------------------------------------------ [INFO] Total time: 6.719s [INFO] Finished at: Fri Dec 12 14:28:16 PST 2014 [INFO] Final Memory: 30M/303M [INFO] ------------------------------------------------------------------------ onos@onos-tutorial:~/onos-byon$ |
mci is an alias for mvn clean install. Now, that your project has successfully built your project let's push it up to the ONOS cluster..
| Code Block |
|---|
onos@onos-tutorial:~/onos-byon$ onos-app $OC1 install target/byon-1.0-SNAPSHOT.oar
{"name":"org.onos.byon","id":39,"version":"1.0-SNAPSHOT","description":"Build Your Own Network App","origin":"Apps-R-Us LLC, Inc. GmbH","permissions":"[]","featuresRepo":"mvn:org.onos.byon/byon/1.0-SNAPSHOT/xml/features","features":"[byon]","state":"INSTALLED"}
|
The onos-app command will take the oar file that is generated during the build and push it into the specified ONOS instance. The command can also activate the application if you replace install with install! as well as separately activate, deactivate, and uninstall the application. Every time you update your code you simply need to run onos-app $OC1 reinstall! target/byon-1.0-SNAPSHOT.org and the new application will be loaded and started in the remote ONOS instances.
...