Due to a ransomware attack, the wiki was reverted to a July 2022 version. . We apologize for the lack of a more recent valid backup.
Overview
An application can create their own custom views and have them integrated into the ONOS web GUI. This tutorial walks you through the process of developing such a view. A fictitious company, "Meowster, Inc." is used throughout the examples.
Application Set Up
The quickest way to get started is to use the maven archetypes to create the application source directory structure and fill it with template code. You can get more details here, but to summarize:
(0) Create a working directory
$ mkdir meow
$ cd meow
(1) Create the main application
$ onos-create-app app org.meowster.app meowster-app
When asked for the version, accept the suggested default: 1.0-SNAPSHOT, and press enter.
When asked to confirm the properties configuration, press enter.
groupId: org.meowster.app
artifactId: meowster-app
version: 1.0-SNAPSHOT
package: org.meowster.app
(2) Overlay the UI additional components
$ onos-create-app ui org.meowster.app meowster-app
When asked for the version, accept the suggested default: 1.0-SNAPSHOT, and press enter.
When asked to confirm the properties configuration, press enter.
(3) Modify the pom.xml file to mark the module as an ONOS app:
$ cd meowster-app
$ vi pom.xml
(a) Change the description:
<description>Meowster Sample ONOS App</description>
(b) In the <properties> section, change the app name and origin:
<onos.app.name>org.meowster.app</onos.app.name>
<onos.app.origin>Meowster, Inc.</onos.app.origin>
(4) Build the app:
$ mvn clean install
Note that your application is bundled as an .oar (ONOS Application ARchive) file in the target directory, and installed into your local maven repository:
...
[INFO] Installing /Users/simonh/dev/meow/meowster-app/target/meowster-app-1.0-SNAPSHOT.oar to
       /Users/simonh/.m2/repository/org/meowster/app/meowster-app/1.0-SNAPSHOT/meowster-app-1.0-SNAPSHOT.oar
...
Import into IntelliJ, if you wish
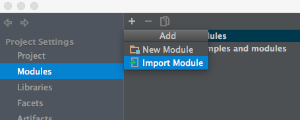
You can import the application source into IntelliJ. In Project Settings, in the Modules section, add a module...
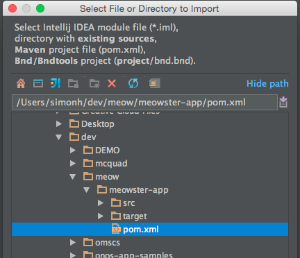
Navigate to and select the pom.xml file...
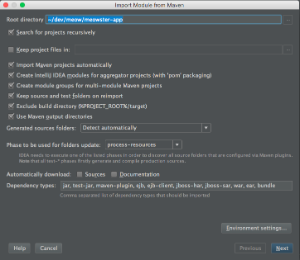
Import the module...
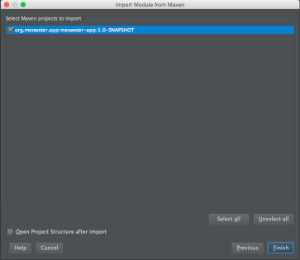
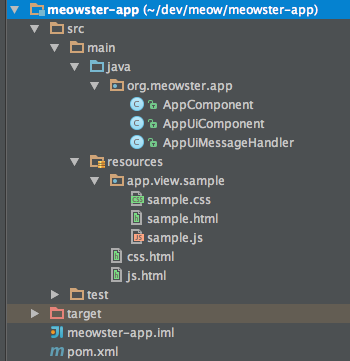
Now in the project structure, you should see something like this:
Description of Template Files
This section gives a brief introduction to the generated files.
AppComponent
This is the base Application class and may be used for non-UI related functionality (not addressed in this tutorial).
AppUiComponent
This the the base class for UI functionality. The salient features to note are introduced briefly below.
(1) Reference to the UiExtensionService:
@Reference(cardinality = ReferenceCardinality.MANDATORY_UNARY)
protected UiExtensionService uiExtensionService;
(2) List of application view descriptors, defining which category the view appears under in the GUI navigation pane (if not a hidden view), the display text for the link, and the internal identifier for the view:
 // List of application views
private final List<UiView> uiViews = ImmutableList.of(
        new UiView(UiView.Category.OTHER, "sample", "Sample")
);
(3) Declaration of a UiMessageHandlerFactory to generate message handlers on demand. The example factory generates a single handler each time, AppUiMessageHandler, described below:
// Factory for UI message handlers
private final UiMessageHandlerFactory messageHandlerFactory =
        () -> ImmutableList.of(
                new AppUiMessageHandler()
        );
(4) Declaration of a UiExtension, configured with the previously declared UI view descriptors and message handler factory:
// Application UI extension
protected UiExtension extension =
        new UiExtension.Builder(getClass().getClassLoader(), uiViews)
                .messageHandlerFactory(messageHandlerFactory)
                .build();
(5) Activation and deactivation callbacks that register and unregister the UI extension at the appropriate times:
@Activate
protected void activate() {
    uiExtensionService.register(extension);
    log.info("Started");
}

@Deactivate
protected void deactivate() {
    uiExtensionService.unregister(extension);
    log.info("Stopped");
}
AppUiMessageHandler
This class extends UiMessageHandler to implement code to handle events from the (client-side) sample application view.
Currently we only have one GUI archetype, which is written as a Tabular View. (We need to create an additional (simpler) archetype for custom views.) So, for now, just note that the details below are subject to change...
Salient features to note:
(1) implement createRequestHandlers() to provide request handler implementations for specific event types from our view:
@Override
protected Collection<RequestHandler> createRequestHandlers() {
    return ImmutableSet.of(
            new SampleDataRequestHandler(),
            new SampleDetailRequestHandler()
    );
}
(2) request handler implementations ...
to be documented