IDE Setup
The project does not enforce the use of a specific IDE, but rather, a set of guidelines that can be configured in an IDE. The examples and documentation focus on IntelliJ IDEA, and include some help for Eclipse. For other IDEs, developers should consult the documentation for the IDE of choice for specific configuration steps.
To get the best support out of your IDE, ONOS should be imported as a Maven project.
If you have no idea where to start, here are some instructions on how to install IntelliJ. The ONOS Screencasts page provides helpful videos on importing, debugging, and developing ONOS with IntelliJ.
Importing the ONOS Source
A helpful screencast illustrating the entire import process can be found here (the link to the video is at the top of the page). Assuming you have obtained the source code already, the following steps can be followed to import ONOS into IntelliJ:
- To import the ONOS project, simply open IntelliJ IDEA and select: File… New… Project from Existing Sources
- If you are starting IDEA for the very first time and don’t have any existing projects, you can alternatively select: Import Project… from the initial options.
- When presented with a file selection dialog, you should navigate to the top of the ONOS source tree and select the root pom.xml file. This will initiate the project import wizard.
- On the first screen we only need to check Sources and Documentation and then press Next.
- Select Next to bypass the Maven profiles.
- Make sure that the org.onosproject:onos Maven project is selected and press Next.
- After this select the JDK 8. If selecting JDK for the very first time, you may need to press the + sign to locate the JDK home directory. Press Next and then Finish.
- At this point IntelliJ will complete the import process by building the project and indexing the source files.
Importing the settings
While the project is being processed, we can go ahead and import the recommended IDEA settings. We do this by selecting File… Import Settings… and then navigating to the ONOStools/dev directory and selecting the idea-settings.jar file. We can complete the process by pressing the OK button.
Importing the Copyright header
Since ONOS is licensed under Apache 2 license, we need to make sure that all source files are properly decorated with the Apache 2 license header file.
To configure IntelliJ appropriately, we will locate the header.txt file under ONOS tools/dev directory and copy its contents. Then, from IntelliJ preferences, we will select Copyright section and add a new new copyright profile. We will call this profile ONOS and paste in the previously copied header text.
Then we will make sure that the newly created ONOS copyright profile is the default and we are done.
As ONOS is a multi-module project, it may appear as a collection of many (about 50 at the time of this writing) projects beginning with "onos-". This is normal for some IDEs such as Eclipse. For a listing of the software modules that comprise ONOS, please refer to the Javadocs, or Appendix C of this Guide. |
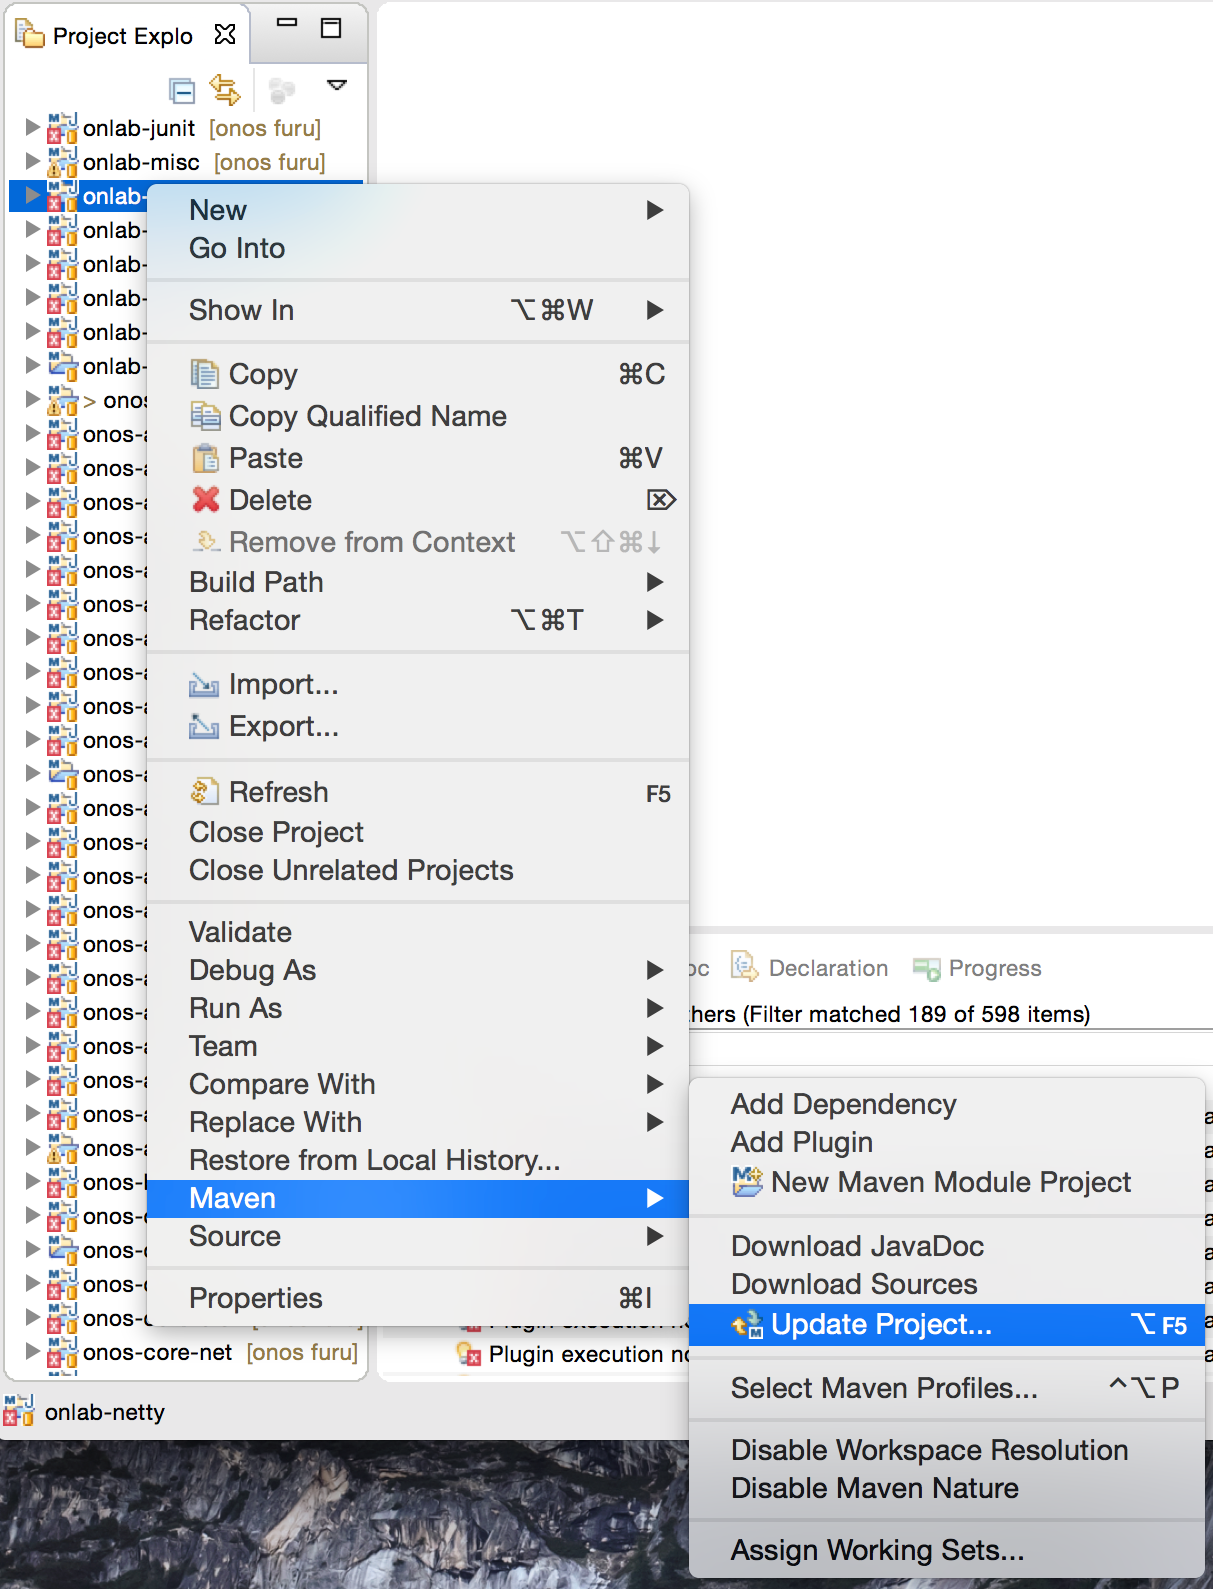
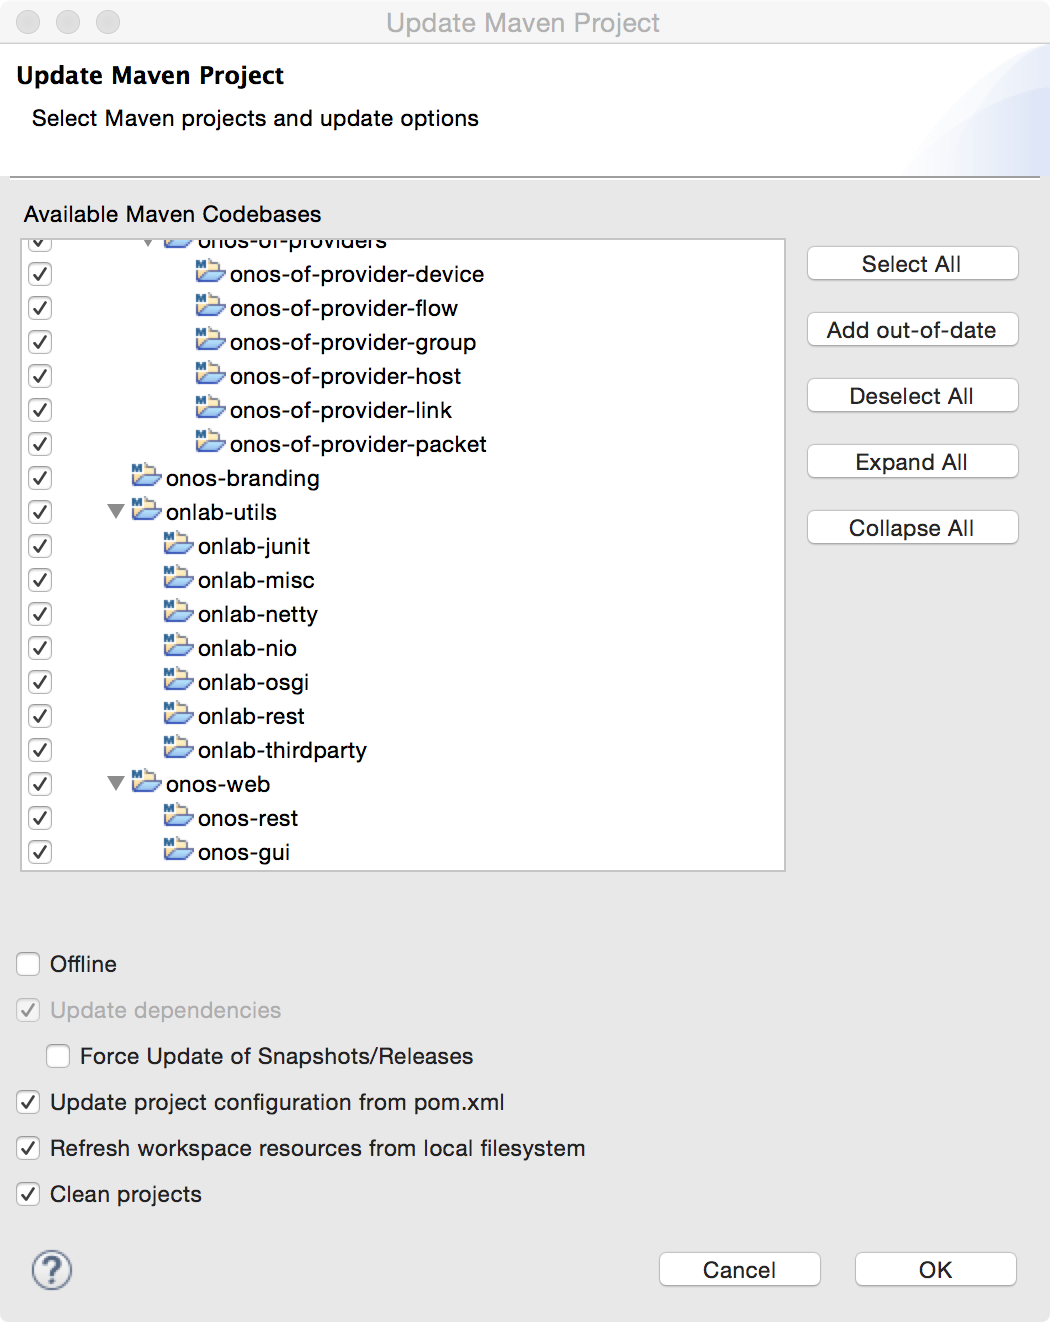
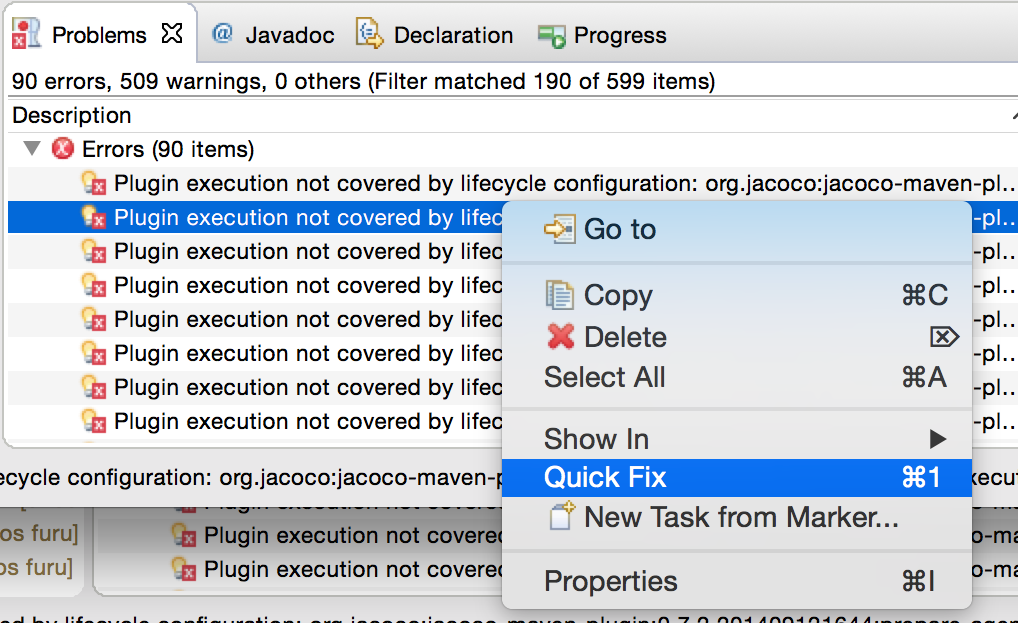
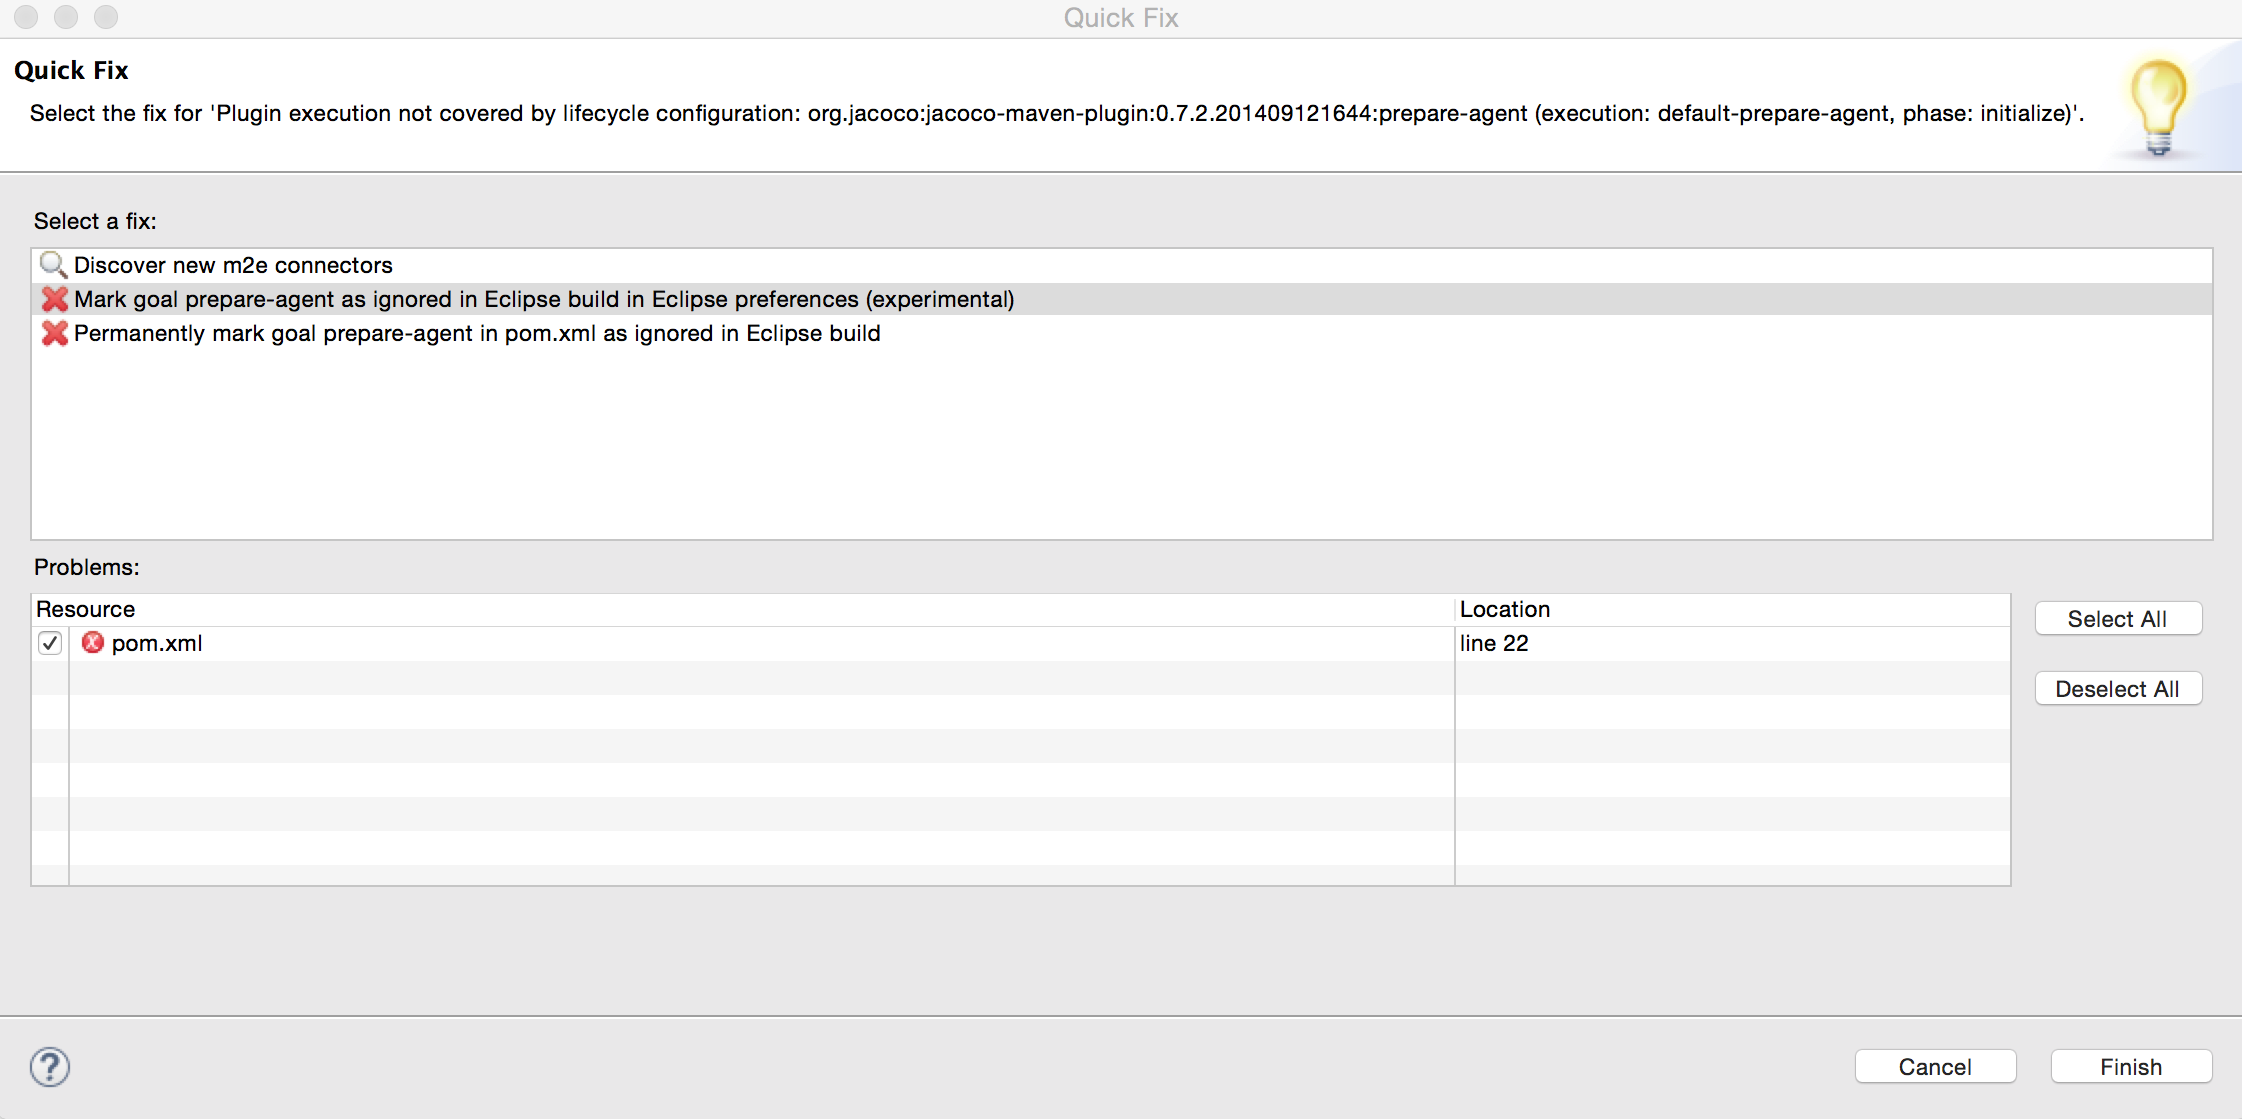
If you're using Eclipse and see "Plugin execution not covered ..." errors about jacoco-maven-plugin and onos-maven-plugin after importing ONOS projects, follow these steps to eliminate those errors. Select one of "Plugin execution not covered..." error and select "Quick Fix" Select "Mark the goal as ignored in Eclipse build in Eclipse preference" as the fix and "Finish" to apply the fix. Select one of the ONOS related project to open the "Update Project" dialog, then "Select All" projects and update all the projects. 

It may take a while for Eclipse to rebuild all the project after refreshing project configuration. |
By following the steps above, maven goal resolution errors for the same goal should disappear. (jacoco-maven-plugin). Repeat the same step for remaining goal error. (onos-maven-plugin)
|


