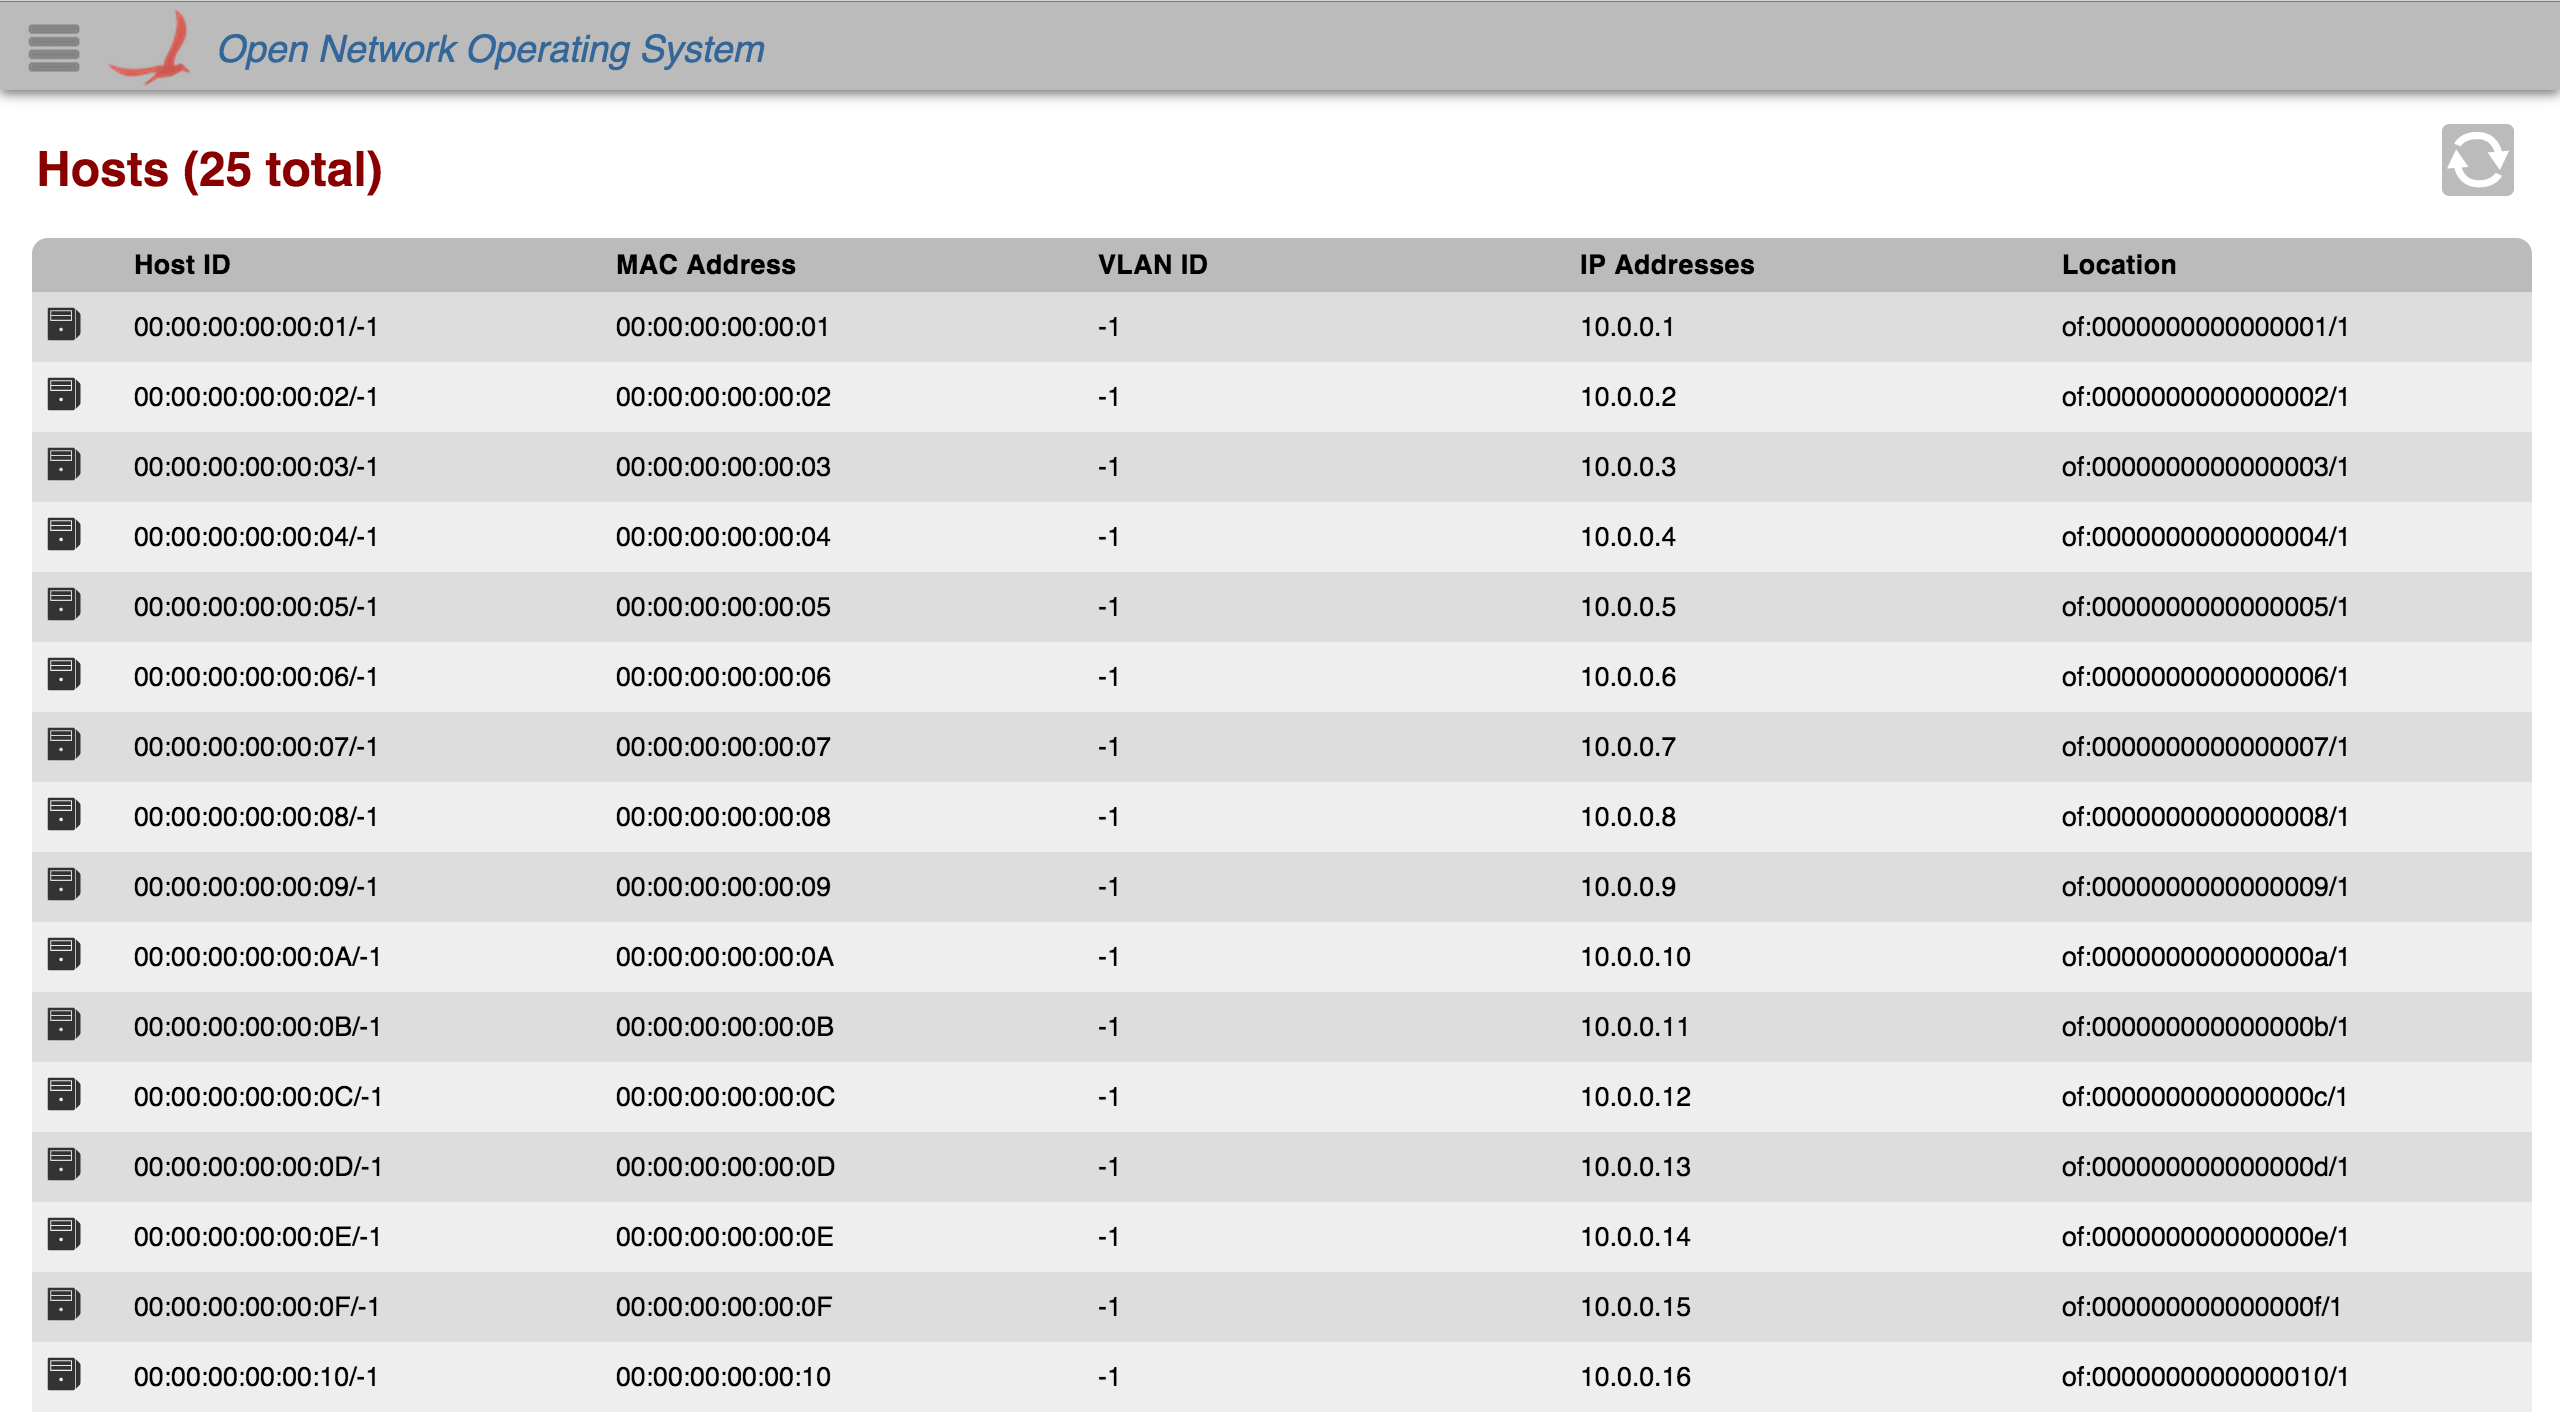
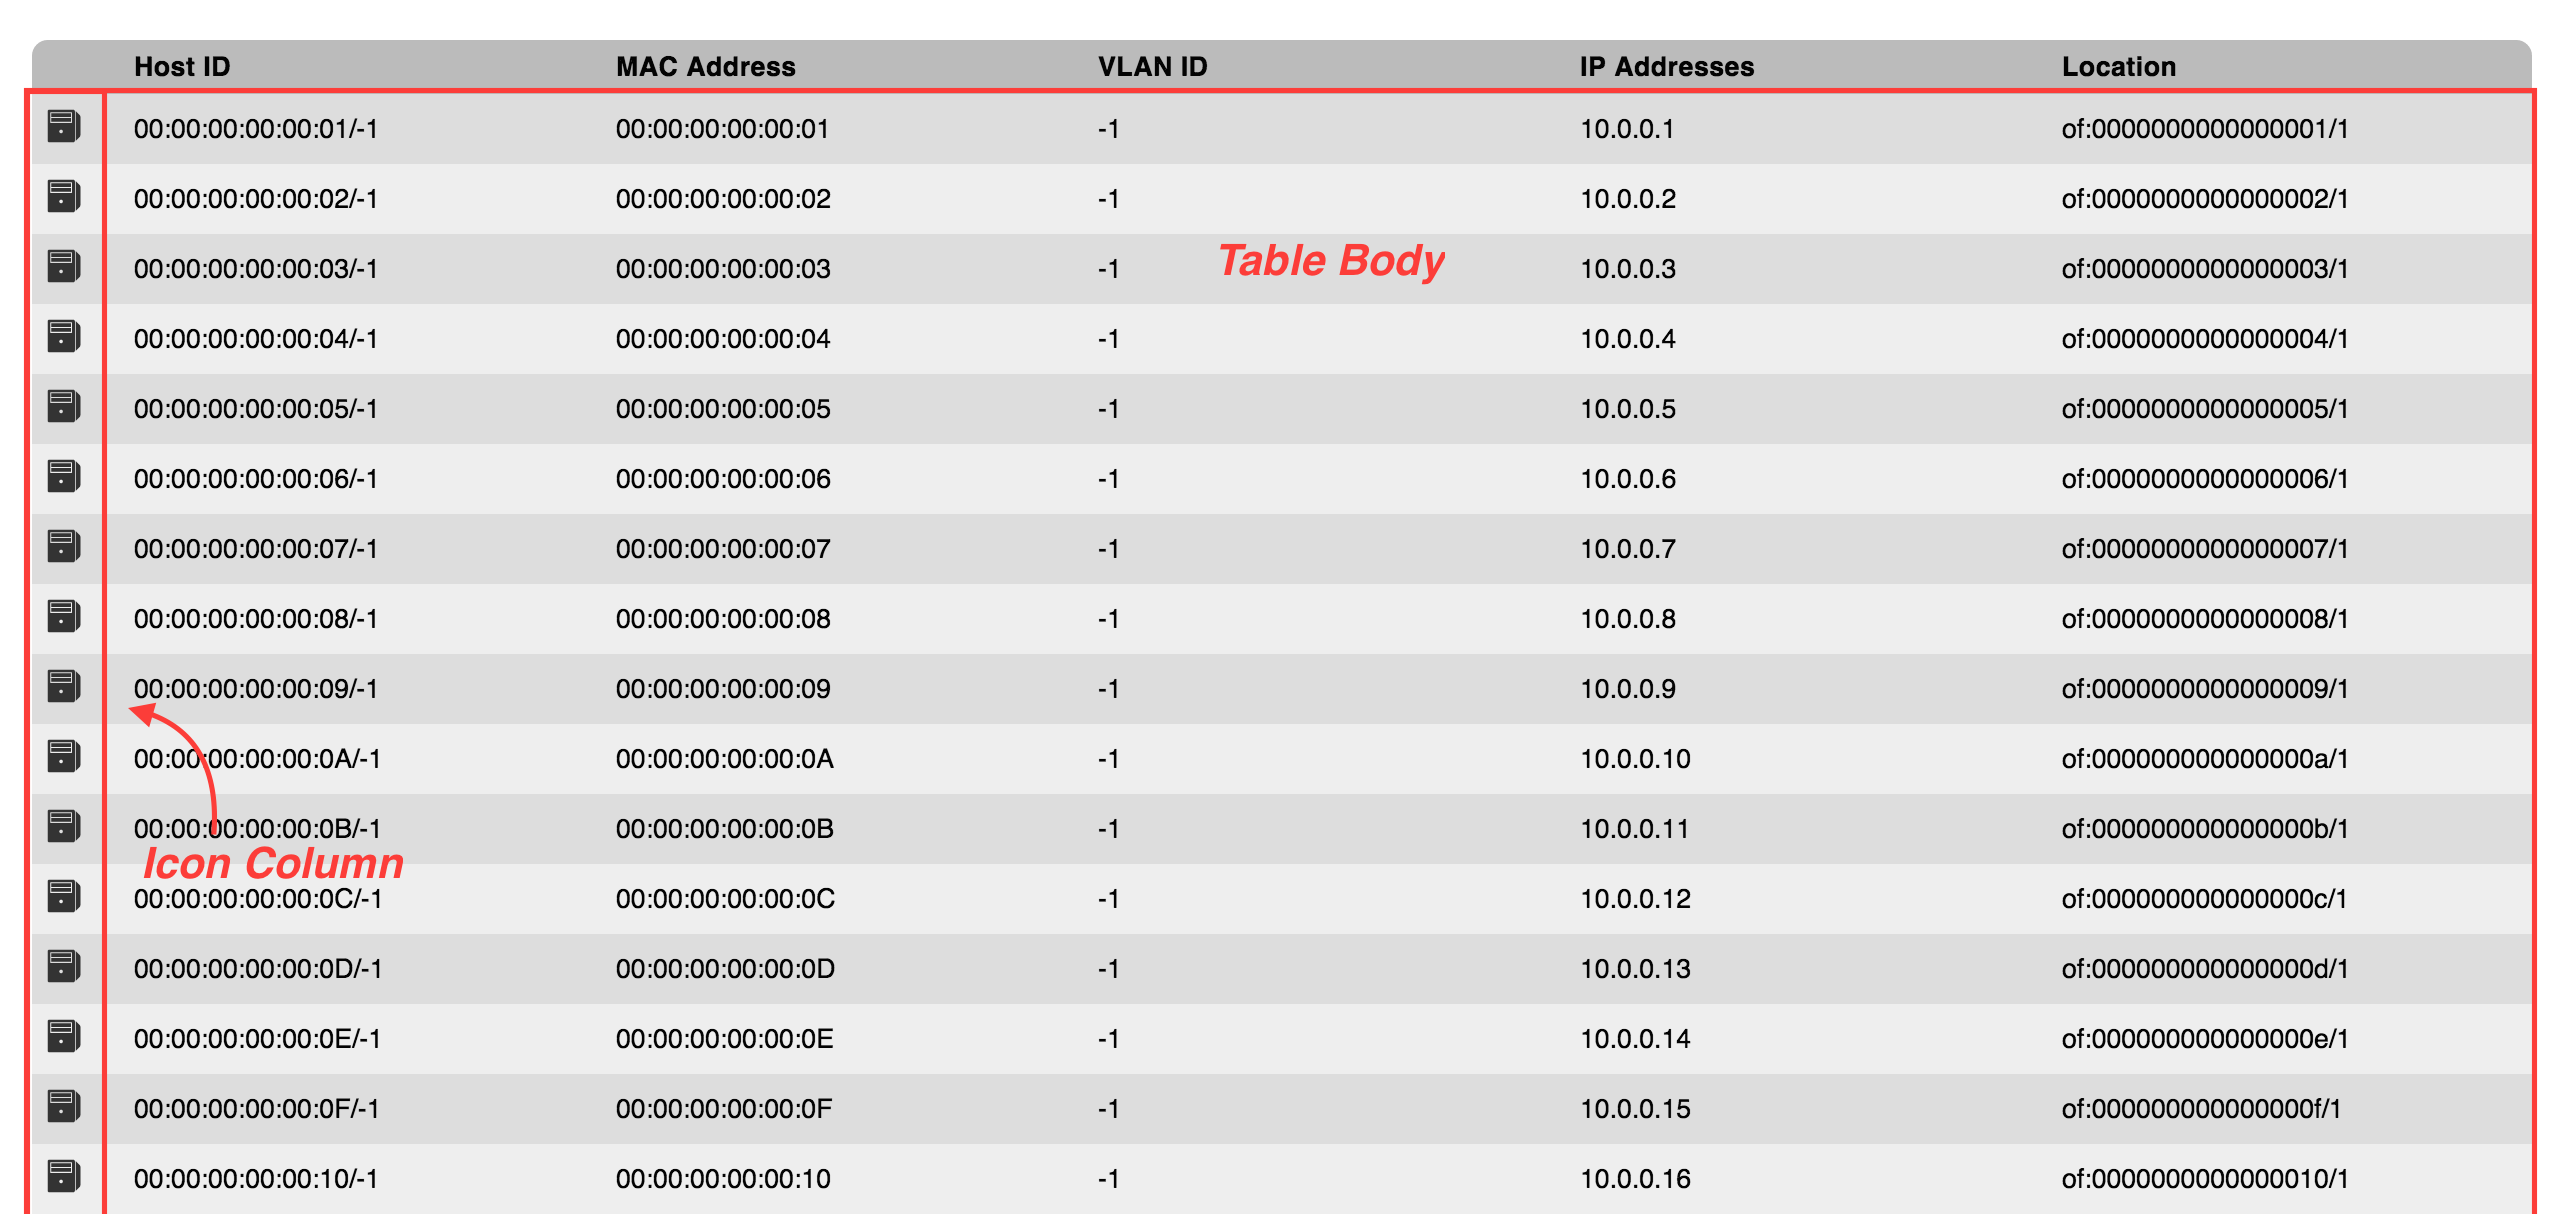
This tutorial will walk through the necessary steps to create a basic tabular view with the "TableBuilderService" API. A basic tabular view is the Host View, shown below.

This tutorial will walk you through creating your very own Foo tabular view! Get excited.
To create your Tabular view, you will need to write both the client and server side files. The client side is written in HTML and Javascript, and the server side is written in Java.
The more complicated of the two client side files that you have to write is the HTML. (No, really!) Tabular Views use a combination of Angular directives and factory services in the ONOS GUI framework to create all of the behaviors of the table.
You just have to call one function in Javascript to create a tabular view.
The most code you will have to write will be on the server side. The server receives requests, gets the data, formats, sorts, and sends back the information to the client side. The client just displays what the server gives it.
So, you're ready to start writing your Foo table then? Great! Read on.
The layout of the HTML - the hierarchy and where directives and inline functions are placed is very important. If you do not follow this HTML layout, there is no guarantee your table will work.
<div class="tabular-header">
    <h2>Foos ({{tableData.length}} total)</h2>
    <div class="ctrl-btns">
        <div class="refresh active"
             icon icon-size="36" icon-id="refresh"
             ng-click="refresh()">
		</div>
    </div>
</div>

<div class="summary-list" onos-table-resize>

    <div class="table-header"
         onos-sortable-header sort-callback="sortCallback(requestParams)">
        <table>
            <tr>
                <td colId="active" class="table-icon" sortable></td>
                <td colId="id" sortable>Foo ID </td>
                <td colId="bar" sortable>Bar </td>
                <td colId="baz" sortable>Baz </td>
                <td colId="desc" col-width="475px" sortable>Description </td>
            </tr>
        </table>
    </div>

    <div class="table-body">
        <table>
            <tr ng-if="!tableData.length" class="no-data">
                <td colspan="6">
                    No Foos found :(
                </td>
            </tr>

            <tr ng-repeat="foo in tableData track by $index"
				ng-click="selectCallback($event, foo)"
				ng-class="{selected: foo === sel}">
                <td class="table-icon">
                    <div icon icon-id="{{foo._iconid_active}}"></div>
                </td>
                <td>{{foo.id}}</td>
                <td>{{foo.bar}}</td>
                <td>{{foo.baz}}</td>
                <td>{{foo.desc}}</td>
            </tr>
        </table>
    </div>

</div> |

The div classed "tabular-header" can contain whatever you would like inside of it. In our example, we have an h2 tag with the title and a div that contains one control button (auto-refresh toggle) for the view. See TableBuilder Functions for more detail.
Note: whatever you have inside of this div should use the CSS style 'padding' for spacing things, NOT 'margin'.
The components of your table go inside a div like this one:
<div class="summary-list" onos-table-resize></div> |
Your whole table should be in a div classed "summary-list" because there is CSS styling that is tailored to this class. onos-table-resize is a directive that is explained below.

The div with the header of your table should be classed "table-header" and have the same layout as this code block:
<div class="table-header"
     onos-sortable-header sort-callback="sortCallback(requestParams)">
     <table>
         <tr>
             <td colId="active" class="table-icon" sortable></td>
             <td colId="id" sortable>Foo ID </td>
             <td colId="bar" sortable>Bar </td>
             <td colId="baz" sortable>Baz </td>
             <td colId="desc" col-width="475px">Description </td>
         </tr>
     </table>
</div> |
onos-sortable-header and sort-callback="sortCallback(requestParams)" are explained later.
You should note that we have two table tags in our one table view. This first table corresponds to the column headers. Note how the headers are td tags, not th tags.
You may label your columns or have no name. In the "active" column in our example, we will have an icon there, so a label is not needed. Also in our table, we want the description column to be wider than the default so there is more room to display the long description.
There are a few options you can add to your headers to give your table some functionality.
| Name | Usage | Description | Required for |
|---|---|---|---|
col-width | attribute col-width with pixel value | Sets column to that specific width in pixels | onos-table-resize |
table-icon | class | Sets column width to a good size for icons | onos-table-resize |
colId | attribute colId with value | Used to identify columns for sorting in ascending or descending order | onos-sortable-header |
sortable | attribute without value | Allows that column to be sortable | onos-sortable-header |

The div with the body of your table should be classed "table-body" and be similar to this:
<div class="table-body">
    <table>
        <tr ng-if="!tableData.length" class="no-data">
            <td colspan="5">
                No Foos found :(
            </td>
        </tr>

        <tr ng-repeat="foo in tableData track by $index"
			ng-click="selectCallback($event, foo)"
			ng-class="{selected: foo === sel}">
            <td class="table-icon">
                <div icon icon-id="{{foo._iconid_active}}"></div>
            </td>
            <td>{{foo.id}}</td>
            <td>{{foo.bar}}</td>
            <td>{{foo.baz}}</td>
            <td>{{foo.desc}}</td>
        </tr>
    </table>
</div> |
This is the table which holds the body of our information. Notice that we don't have to put a tr tag for every Foo item that we want. We are using ng-repeat with the track by notation instead. We are also using Angular's automatic data binding (curly-brace notation {{}}) to display all of the information in the cells.
We have to class our icon column with "table-icon" so that it will be sized correctly.
The first tr tag is optional and contains only one cell with a message that is displayed when there are 0 items in the tableData array. ng-if removes this row when we have data.
The second tr tag is required and represents one item of data. If you would like one item to span multiple rows (optional), your data tr tags may look something like this:
<tr ng-repeat-start="foo in tableData track by $index">
    <td>{{foo.id}}</td>
    <td>{{foo.bar}}</td>
    <td>{{foo.baz}}</td>
    <td>{{foo.zoo}}</td>
</tr>
<tr>
    <td class="desc" colspan="4">{{foo.desc}}</td>
</tr>
<tr ng-repeat-end>
    <td class="instructions" colspan="4">{{foo.instructions}}</td>
</tr> |
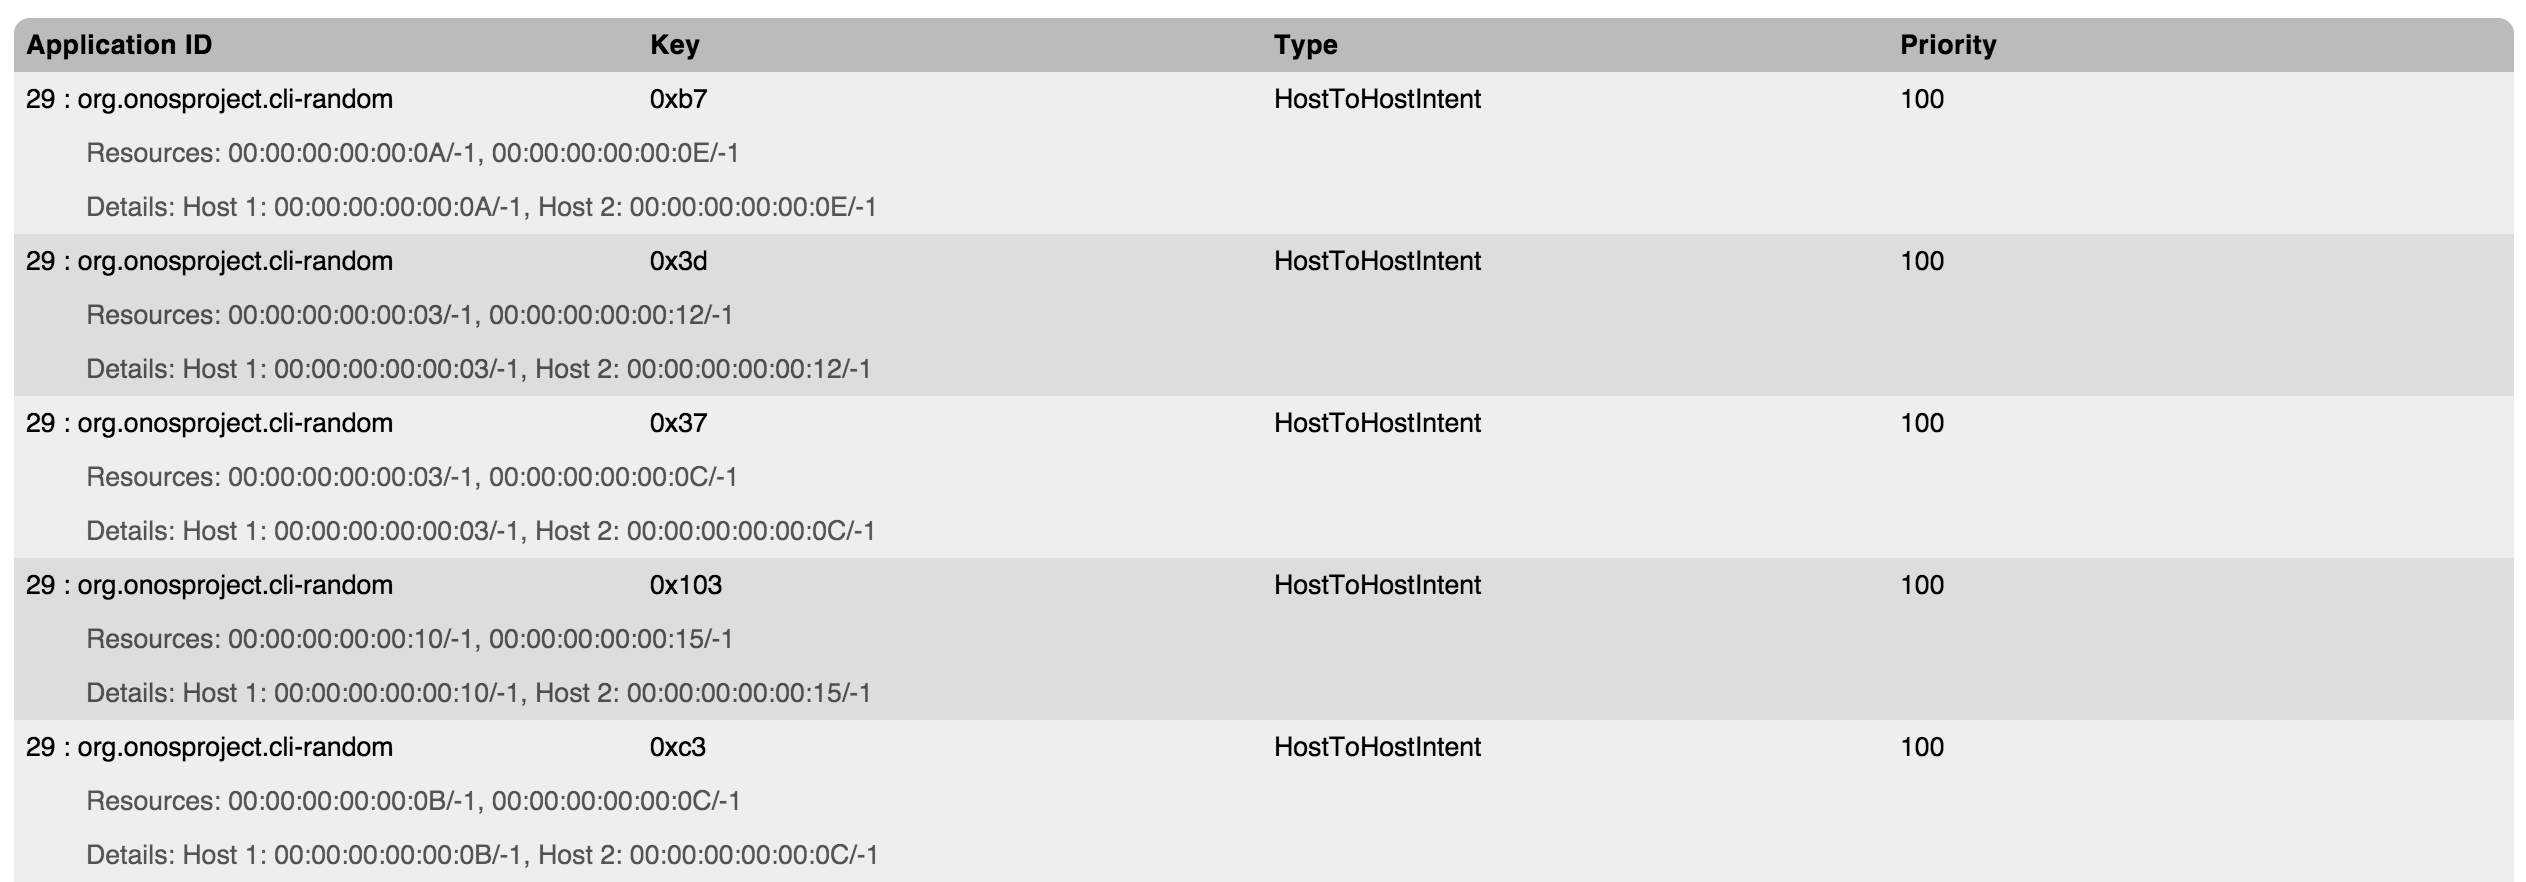
This would create 3 rows for each item of data that you then could style to make them look as if they belong together. Notice that the two rows that span multiple columns have the "ignore-width" class. The Intent View uses this technique:

As you have seen, Angular directives have been used extensively to make the Tabular View in HTML. Below are short descriptions of what each custom directive is used for.
| Directive | Description |
|---|---|
onos-table-resize | Dynamically resizes the table to take up the size of the window and to have a scrolling inner body. The column widths are dynamically adjusted as well. |
onos-sortable-header | When a sortable header is clicked on, it sends a request to the server to sort the information by ascending or descending order, and inserts an icon indicating the current sorting direction. Uses sort-callback attribute with a function to execute the sorting: sort-callback="sortCallback(requestParams)". |
icon | This directive will be explained in API documentation sometime in the future. To use it, just put the name of the icon you would like to use as the value of the icon-id attribute. |
And that's it - those are all the things you need in your HTML to get the table to work.
In order to create a table, you must first inject the TableBuilderService and $scope dependencies (using Angular). In the following example, our TableBuilderService is set to a variable called tbs and the $window dependency has also been injected.
tbs.buildTable({
    scope: $scope,
    tag: 'foo'
	selCb: function () { $window.alert('You clicked me!'); }
}); |
The code above will build you a basic table with all the functions you need to sort by ascending and descending order, to refresh the table, and to send and receive websocket requests. Pretty neat, huh?
scope and tag are the only required object parameters to the TableBuilderService. However, there are a couple of optional ones as well.
To the scope parameter, you must pass the injected $scope dependency from AngularJS.
To the tag parameter, you pass a unique string to be used in websocket requests and responses.
Note: the tag must be SINGULAR, because the TableBuilder puts an 's' on the end.
To the selCb parameter (sort for SELect CallBack), you should pass a function that you want to be called when a row is selected. This only applies to tables with selectable rows. If you don't want anything to happen when someone clicks on a row, don't include this tag. See HTML directives for more information on selecting rows.
You can pass a function to the respCb parameter that will be executed when the data is received from the server. By default, the table will just be updated with the new information.
To the query parameter, you should pass an object with string name / value pairs that will be used in websocket calls. Mainly they are used as identifiers to tell the server what kind of information we are most interested in. We are not including query parameters in this example, but if you did want to use this tag, your code would look something like this:
var params = $location.search(); // get the query parameters passed to this page's URL

tbs.buildTable({
    scope: $scope,
    tag: 'foo',
    query: params // give them to the TableBuilderService to pass on to the server
}); |
You might have noticed (if you looked ahead) that even though we gave the buildTable function the tag "foo", that the request and response for our table is for "foos" pluralized, not "foo". This is due to the behind the scenes of the TableBuilderService.
buildTable() is doing a fair amount of work behind the scenes. It is handling the basic setup and takedown of websocket handlers, destroys the table when you leave the view, and attaches several variables and functions to the scope of the view so that you don't have to. Just know that if you follow the above HTML format and Javascript parameters carefully, that TableBuilder will take care of the rest and you'll have a shiny new table view quickly!
Please see the TableBuilderService for an in-depth look at what it attached to the scope.
The TableBuilderService attaches several functions to the controller's $scope. A brief summary of them are below.
| Function Name | Description |
|---|---|
sortCallback | Sends a websocket request to the server with optional parameters of sort direction and query object |
selectCallback | Called when a row in the table is clicked on / selected |
toggleRefresh | Will toggle on and off auto-refresh. Auto-refresh sends a websocket request to the server every two seconds |
If you would like to access any of these functions in your Javascript code, invoke them with $scope.<function name>(<arguments>);
If want to name anything on the $scope with these names, you must set them after calling the TableBuilderService or else your assignments will be overwritten.
Writing the server side for a basic tabular view is simple. There is a Table Model Java class that allows you to model individual rows, format specific cells, and sort each item by ascending or descending order.
To see how to write a general message handler, see the UI Extension Component page. In our example, we will be creating a FooViewMessageHandler class that looks like this:
public class FooViewMessageHandler extends UiMessageHandler {
	// websocket handler strings
	private static final String FOO_DATA_REQ = "fooDataRequest";
	private static final String FOO_DATA_RESP = "fooDataResponse";
	private static final String FOOS = "foos";

	// column IDs used in HTML
	private static final String ACTIVE_IID = "_iconid_active";
	private static final String ID = "id";
	private static final String BAR = "bar";
	private static final String BAZ = "baz";
	private static final String DESC = "desc";

	private static final String[] COL_IDS = {
        ACTIVE_IID, ID, BAR, BAZ, DESC
	};

	@Override
	protected Collection<RequestHandler> createRequestHandlers() {
    	return ImmutableSet.of(new FooDataRequest());
	}
	// handler for foo table requests here ...
} |
The TableBuilderService takes the tag you gave it (in our example "foo") and creates the following tags.
| String | Description |
|---|---|
"fooDataRequest" | The request sent to the server via the websocket. |
"fooDataResponse" | The response sent back to the client via the websocket. |
"foos" | The "root" tag of the object that the data is under in the response. Notice that there is an 's'! Example websocket response: |
The column IDs that we used in our HTML are declared as constants to be used later in constructing our table. We also must make an array of the IDs for the TableModel to use as a reference for rows.
See the UI Extension Component page for a detailed explanation about the createRequestHandlers function.
Since you used the TableBuilderService, it created specific request and response strings for you that you must include in your Java code. For our example, we will create a private FooDataRequest class that extends TableDataHandler:
private final class FooDataRequest extends TableRequestHandler {
    private FooDataRequest() {
        super(FOO_DATA_REQ, FOO_DATA_RESP, FOOS);
    }

    @Override
    protected String[] getColumnIds() {
        return COL_IDS;
    }

    @Override
    protected TableModel createTableModel() {
        TableModel tm = super.createTableModel();
        tm.setFormatter(BAR, new BarFormatter); // see Formatters section below
		tm.setComparator(BAZ, new BazComparator); // see Comparators section below
        return tm;
    }

    @Override
    protected void populateTable(TableModel tm, ObjectNode payload) {
        // get the data you want -- pretend we have a FooService
		FooService fs = get(FooService.class);
        for (Foo foo : fs.getFoos()) {
            // add a row in the table for each item that you want
			populateRow(tm.addRow(), foo);
        }
    }

    private void populateRow(TableModel.Row row, Foo foo) {
        row.cell(AVAILABLE_IID, getAvailableIconId(foo))
                .cell(ID, foo.id())
                .cell(BAR, foo.bar())
                .cell(BAZ, foo.baz())
                .cell(DESC, foo.desc());
    }
	private String getAvailableIconId(Foo foo) {
    	return foo.availability() ? "checkMark" : "xMark";
	}
} |
Your request handler (FooDataRequest in our example) must extend TableRequestHandler. TableRequestHandler deals with incoming and outgoing requests and handles its data in a TableModel. The TableModel class is an abstraction of a generic table with columns and cells of specific object types.
You just need to call the TableRequestHandler's constructor with the constants we declared above – the request, response, and root tag strings.
There are three TableModel functions you must override in order to get your table working:
| Name | Returns | Description |
|---|---|---|
getColumnIds |
| Give the array of column IDs to the table model to keep track of the name of each column and their order. |
|
| This is where you will create the model that TableModel will use behind the scenes. Here you will want to set any special formatters and comparators that any specific column will need. |
| void | In this function, you will populate the table with all of the data that you want. In our example, we have a helper method called "populateRow" that gets the TableModel's inner Row class and uses the cell function to put the ID of the column and the data for that specific row. |
Remember: each row represents one unit of whatever you are displaying. Each cell is a detail about that unit.
In our example, each row is a "foo" and each foo has details "available", "id", "bar", "baz", and "desc".
All of the presentation and sorting logic happens on the server side. Formatters and Comparators take care of this for us (see below).
By default, each cell just does uses the toString() method on the object to send back to the client. However, for each column, you can write a Formatter in order to make the data you send to the client look different than the default toString. To do this, you will want to write a formatter that implements CellFormatter, like below:
private final class BarFormatter implements CellFormatter {
    @Override
    public String format(Object value) {
		// format and return your object as a string here
    }
} |
By default, each cell uses the compareTo() method to sort rows with. If the data that you want to sort on implements Comparable, (like ints, longs, etc.) then the default will work just fine. However, if you want your own comparator, you can implement CellComparator, like below:
private final class BazComparator implements CellComparator {
    @Override
    public int format(Object o1, Object o2) {
		// return an integer: negative for less than, zero for equal, positive for greater than
    }
} |
Note that null values are allowed and are considered "smaller" than non-null values.
Note: best practice is to define your custom formatter and comparator classes inside of the class that extends TableRequestHandler. In our example, that would mean putting your BarFormatter and BazComparator inside of FooDataRequest.
Included as an example, is using the foo object's availability (which we are assuming is a boolean) to display an icon of a checkmark if true and a xmark if false. We are returning the icon's name that we want to use in the icon directive on the client side.
You should have already read the UI Extension Component page on how to register UI content with the GUI. If not, read that now.
And now you have your very own table view! Congratulations!