This section describes how to contribute documentation to the project. It also describes the formatting conventions that are used by the pages in the ONOS documentation set.
Overview
The ONOS documentation set contains the following major items:
- ONOS for Newcomers - Tutorials and Screencasts to get people new to ONOS up-to-speed
- Documentation Library - Main body of documentation for the platform in the form of User, Developer, and Architecture guides
- Use Cases - Landing page to each use case's documentation
- Feature Proposals - Landing page to each in-progress or experimental feature in various stages of development
There are more sections, but the above set are the sections that a contributors are usually interested in. Except for the use cases, which are maintained by the members of the use cases, most everything else is contributed by the general ONOS community.
Where should <TOPIC> go?
Often, someone has something that they would like to write about, but isn't sure about where to add their topic(s). The following rules can be followed to get an idea about where to place a certain item:
- If it describes steps for how to build up to a specific, tangible example that can be run, it is a tutorial.
- If it describes a work-in-progress or a to-be-implemented function related to ONOS itself, it is a feature proposal.
- If it describes a mature function or feature and focuses on:
- The design, architecture, and/or implementation, it is part of the Architecture and Internals.
- How to extend or modify functionality through code (APIs, classes/interfaces, etc), it is part of the Developer's Guide.
- How a user can interact with it, it is part of the User's Guide.
- If it describes anything about a use case, it should be added under Use Cases. For existing use cases, it is best to consult its members for where the page/topic belongs.
Communication channels
Have questions or want to talk with us about docs? Join us on one of these channels:
- The onos-docs channel on Slack
- The onos-discuss mailing list
- The ONOS Documentation Community Calls every other Wednesday at 2 pacific (check the ONOS Community Calendar for dates)
Procedure
Like everything else for the project, prominent documentation-related tasks are tracked on the ONOS Project JIRA in the Documentation epic. Anyone interested in contributing should register for an account for the project Wiki and JIRA. To register, go here and follow the 'Join ONOS' button.
Working on existing tasks
A potential contributor should take ownership of a ticket if they see a task that they're interested in. A current maintainer will review the changes, and provide feedback if needed. Find a list of documentation tasks that need someone to drive on Jira (and once one of these documentation tasks is done, we're happy to thank you with some ONOS swag).
Adding new content
A contributor interested in adding new content (tutorials, sections in the guides, etc.) should check if a JIRA ticket exists for the task in mind. If not, they should create a new ticket for the task, and take ownership of it. Messages should be sent to onos-discuss:
- Initially with ideas for the content (to help de-duplicate effort)
- With link(s) to the new content once it's written (so that reviewers are aware of the content)
There may be several feedback cycles before the new pages are formally linked into the tutorials page or the documentation set.
Formatting Conventions
The ONOS Guides and tutorials are written using the Confluence Wiki markup interface. In order to lower the curve required to add or edit information, and to introduce consistency, the Guides avoid the usage of raw HTML and Wiki Notation (the exceptions being some of the Appendix pages), instead relying on formatting and macros provided by the default Confluence interface.
Several conventions are used within the documents, and any new material should conform to them to keep a uniform look.
For an introduction to the basics of editing the wiki, refer to Getting Started with Wiki Contents.
For a sample template page implementing the conventions described here, refer to Sample Document Template.
Section Headings
Each section in a page should have a terse title in one of the Heading levels under the Paragraph dropdown. The convention for (sub)section headings are:
- Main sections : Heading 2
- Subsections : Heading 3
- Subsequent subsections : Heading 4
To apply a heading format, simply place the cursor on a line, and select the heading from the dropdown.
Table of Contents (TOC)
- For Individual Pages :
A new page with more than one section should always have a table of contents near the top, after a brief summary of the page. This makes it easier for someone to get the gist of the page. The Table of Contents macro is used to automatically grow the TOC out of the page as sections are added. To add a TOC, select Insert > Table of Contents. A popup for TOC options should appear. Here, set the Maximum Heading Level to 3, to prevent the TOC from capturing subsections past Heading 3. This aids to reduce the noise in the listing. - For the Guides :
An ONOS guidebook is a collection of child pages whose parent pages contain a top-level table of contents. This TOC shows pages and their main sections (i.e. up to Heading 2 of a page) as links.
Code blocks
Code blocks are used instead of inlined monotype for multi-word/line commands and sample shell/CLI output. Code blocks may be added by:
- Navigating to Insert > Other Macros
- Choosing Code Block from the "Select Macro" popup window
This brings up the prompt for configuring the code block. If copying terminal output, syntax highlighting should be turned off by selecting "Plain Text" in the Syntax Highlighting option before hitting "Create". Otherwise, select the appropriate language scheme.
Links
It is good to link to the appropriate pages/sections whenever they are mentioned.
Whenever a new page is added to a Guide, corresponding links should also be added to the top-level TOC.
Diagrams and Figures
These are usually in PNG format, though others are acceptable. To add a figure, select Insert > Image > Upload images and browse to the image to add.
A figure's size is also usually adjusted to about 650px wide by entering a custom size:
Tables
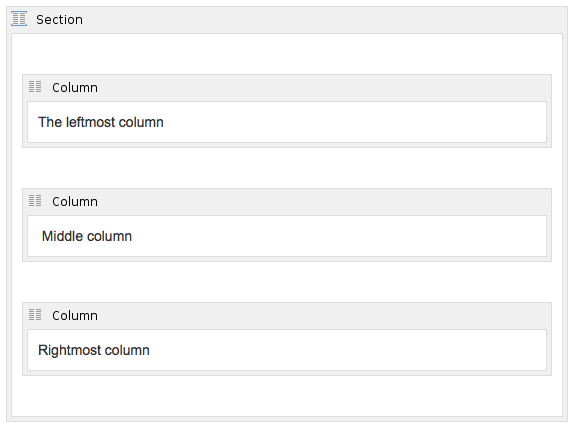
The default tables available from the GUI have borders. If borders are not wanted, or more than 20 rows are needed, consider using a combination of the Section and Column macros.
To access these macros, select Insert > Other Macros and search for "Section".
The above will appear as an line of text across three invisible columns:
The leftmost column
Middle column
Rightmost column
Page Naming
Choose a name that describes the contents. Some special characters, such as '/' should be avoided, as this can have unexpected results e.g. unresolved links.
Content for Appendices
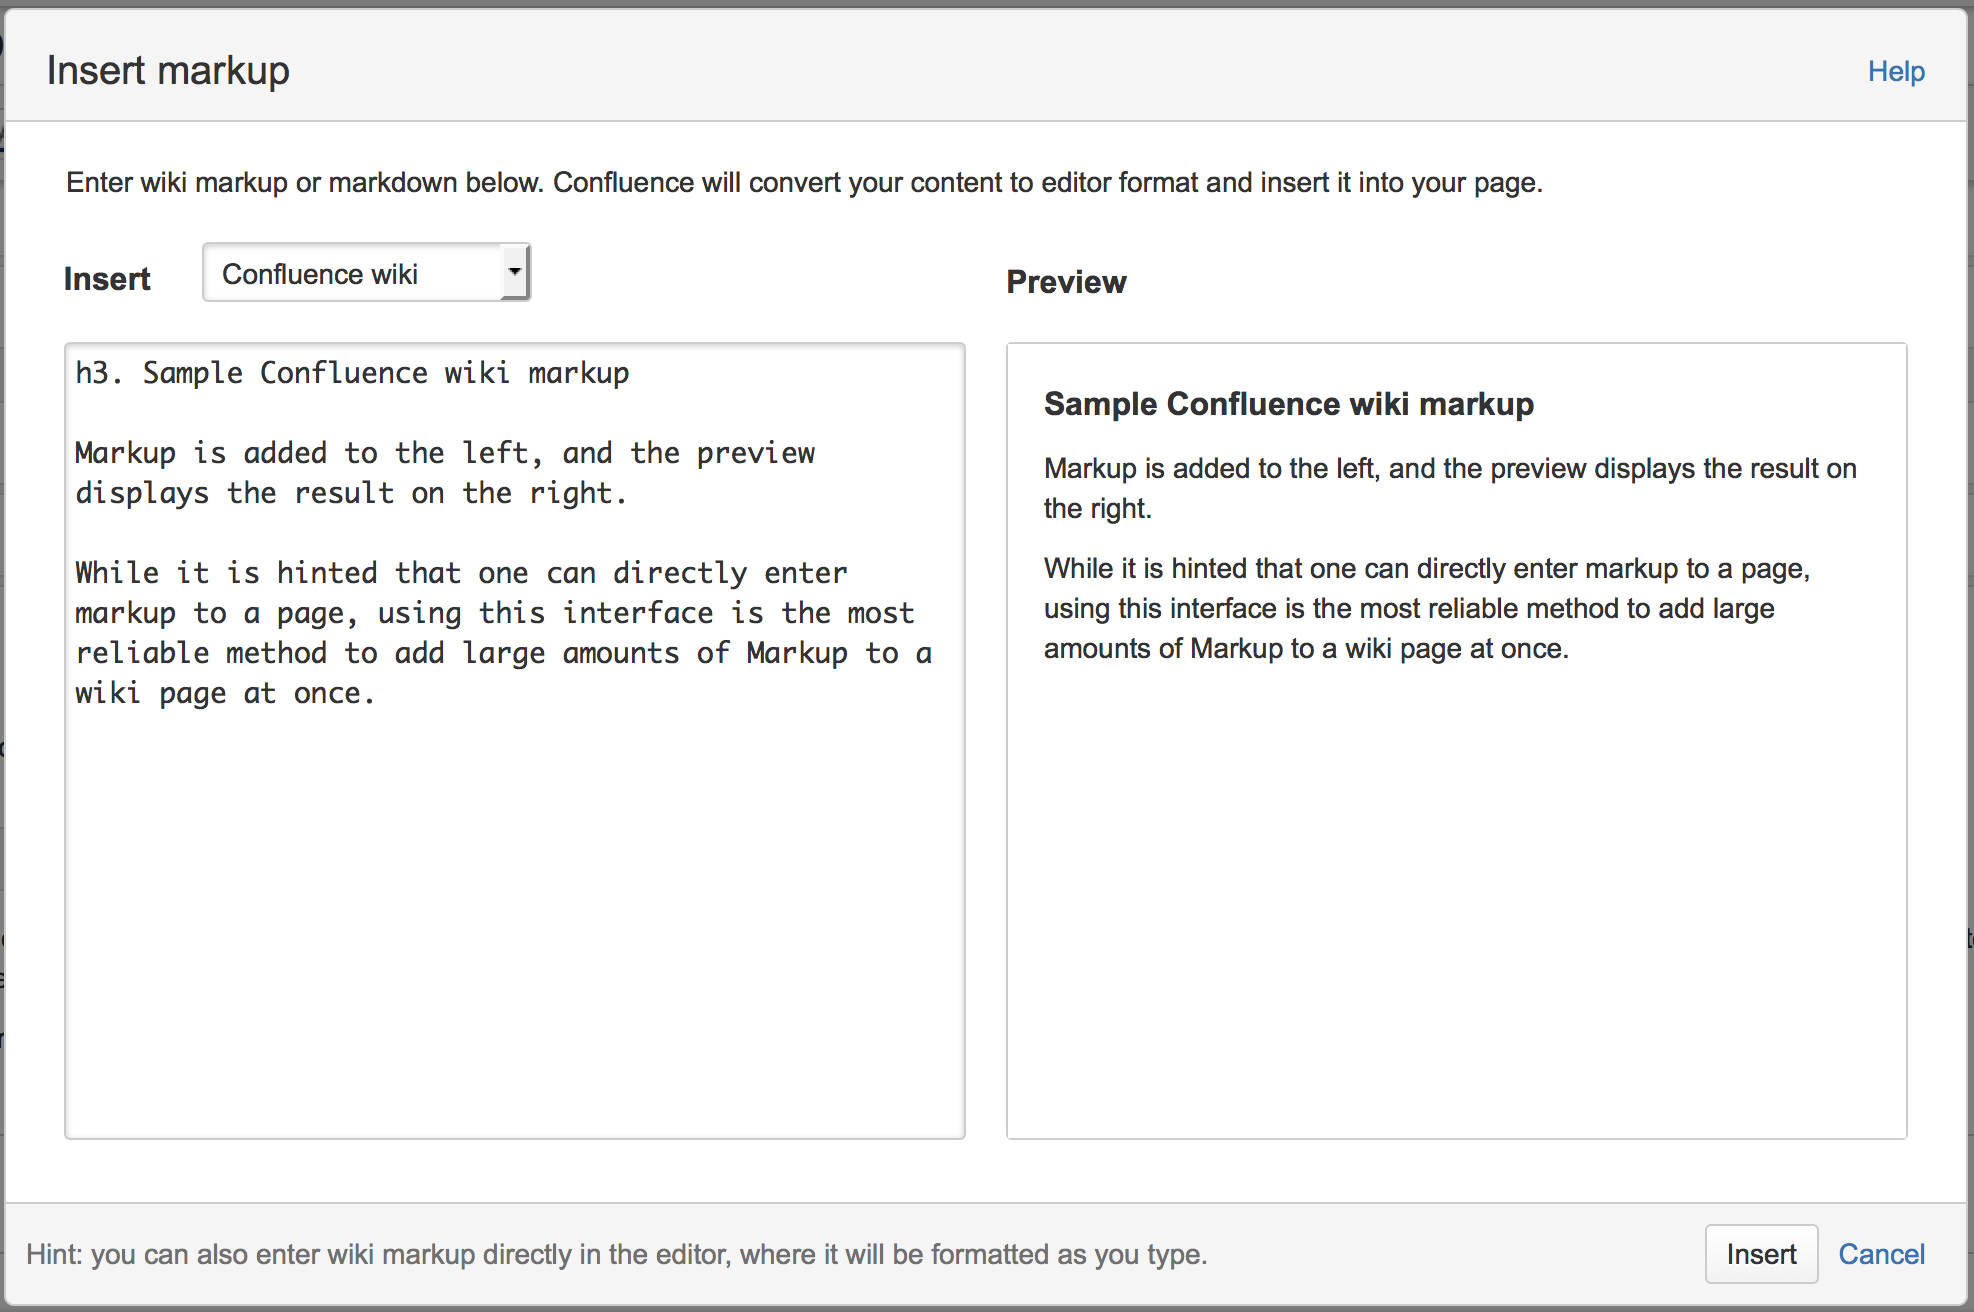
The Appendices of the ONOS Guides contain information that is fairly painful to collect and/or format by hand. A small set of scripts have been written that either generate content that can be pasted into the wiki markup dialogue, or scrape the source code for relevant information.
The markup dialogue is accessed from the Confluence editor with ctrl-shift-d. The dialogue box displayed in the editor is shown below:
More information about Confluence Markup can be found here.
Previous : Sample Gerrit Workflow
Next : Appendix A : List of ONOS Test Scripts


