Due to a ransomware attack, the wiki was reverted to a July 2022 version. . We apologize for the lack of a more recent valid backup.
We describe how to configure, run, and test the OpenstackSwitching application. If you did not set up your environment including openstack and onos, you must set up your environment following the page: How to set up environment from scratch. Also, if you This walkthrough demonstrates most SONA features, as well as its typical usage in concert with OpenStack. The walkthrough assumes that you are familiar with how to execute ONOSuse ONOS and OpenStack. If you're not, we strongly recommend you to go though ONOS Tutorial page: through Tutorials and Walkthroughs
How to run OpenstackSwitching application
...
Remove br-int bridge on the Contorl node
| Code Block | ||
|---|---|---|
| ||
$ sudo ovs-vsctl del-br br-int |
The process will be unnecessary very soon.
Configure OpenstackSwitching application: network-cfg.json
| Code Block | ||||||
|---|---|---|---|---|---|---|
| ||||||
{
    "apps" : {
        "org.onosproject.openstackswitching" : {
            "openstackswitching" : {
                 "do_not_push_flows" : "false",
                 "neutron_server" : "http://OPENSTACK_CONROL_NODE_IP:9696/v2.0/",
                 "keystone_server" : "http://OPENSTACK_CONROL_NODE_IP:5000/v2.0/",
                 "user_name" : "admin",
                 "password" : "nova"
             }
        },
        "org.onosproject.dhcp" : {
            "dhcp" : {
            "ip": "10.0.0.1",
            "mac": "1a:2b:3c:4e:5e:6f",
            "subnet": "255.0.0.0",
            "broadcast": "10.255.255.255",
            "router": "10.0.0.1",
            "domain": "10.0.0.1",
            "ttl": "63",
            "lease": "300",
            "renew": "150",
            "rebind": "200",
            "delay": "3",
            "timeout": "150",
            "startip": "10.0.0.110",
            "endip": "10.0.0.130"
          }
        },
        "org.onosproject.cordvtn" : {
            "cordvtn" : {
                "nodes" : [
                    {
                        "hostname" : "compute-01",
                        "ovsdbIp" : "COMPUTE_NODE_IP",
                        "ovsdbPort" : "6640",
                        "bridgeId" : "of:0000000000000001"
                     },
                     {
                        "hostname" : "compute-02",
                        "ovsdbIp" : "COMPUTE_NODE_IP",
                        "ovsdbPort" : "6640",
                        "bridgeId" : "of:0000000000000002"
                     },
                     {
                         "hostname" : "network",
                         "ovsdbIp" : "OPENSTACK_CONTROL_NODE_IP",
                         "ovsdbPort" : "6640",
                         "bridgeId" : "of:0000000000000003"
                     }
                ]
            }
        }
    }
} |
We need to configure the OpenstackSwitching application using the standard ONOS Network Configuration framework, network-cfg.json file.
...
org.onosproject.openstackswitching...
do_not_push_flows...
"true": it does not push any flow rules to OVS and works as just the Openstack interface.
"false": it pushes all flow rules to OVS
...
neutron_server...
URL to the neutron server
...
keystone_server...
org.onosproject.dhcp...
org.onosproject.cordvtn:cordvtn:nodes...
cordvtn:nodes...
hostname...
ovsdbPort...
bridgeId...
and http://docs.openstack.org.
If you are more comfortable with Horizon UI, then please refer to SONA Walkthrough with Horizon.
Tip) The following cloud-init script helps to set password of "ubuntu" user to "ubuntu" for UEC image, if you pass this script to Nova with "--user-data" option when you create a new VM.
| Code Block |
|---|
#cloud-config
password: ubuntu
chpasswd: { expire: False }
ssh_pwauth: True |
Switching
Create two tenant networks and virtual machines in OpenStack, and then test tenant network connectivity and isolation.
| Code Block | ||
|---|---|---|
| ||
neutron net-create net-A
neutron subnet-create net-A 192.168.0.0/24
neutron net-create net-B
neutron subnet-create net-B 192.168.1.0/24

nova boot --flavor 2 --image ubuntu-14.04-server-cloudimg-amd64 --user-data passwd.data --nic net-id=[net-A-UUID] net-A-01
nova boot --flavor 2 --image ubuntu-14.04-server-cloudimg-amd64 --user-data passwd.data --nic net-id=[net-A-UUID] net-A-02
nova boot --flavor 2 --image ubuntu-14.04-server-cloudimg-amd64 --user-data passwd.data --nic net-id=[net-B-UUID] net-B-01 |
- Can ping between net-A-01 and net-A-02
- Can't ping between net-A-01 and net-B-01
Routing
Create another network for the external access and floating IP with the subnet range specified in the ONOS-vRouter network config(see SONA Network Configuration Guide).
| Code Block | ||
|---|---|---|
| ||
neutron net-create net-public --router:external True --provider:physical_network external --provider:network_type flat
neutron subnet-create net-public 172.27.0.0/24 |
Create a router, and add gateway and interfaces.
| Code Block | ||
|---|---|---|
| ||
neutron router-create router-01
neutron router-gateway-set router-01 net-public
neutron router-interface-add rotuer-01 [net-A-subnet UUID]
neutron router-interface-add router-01 [net-B-subnet UUID] |
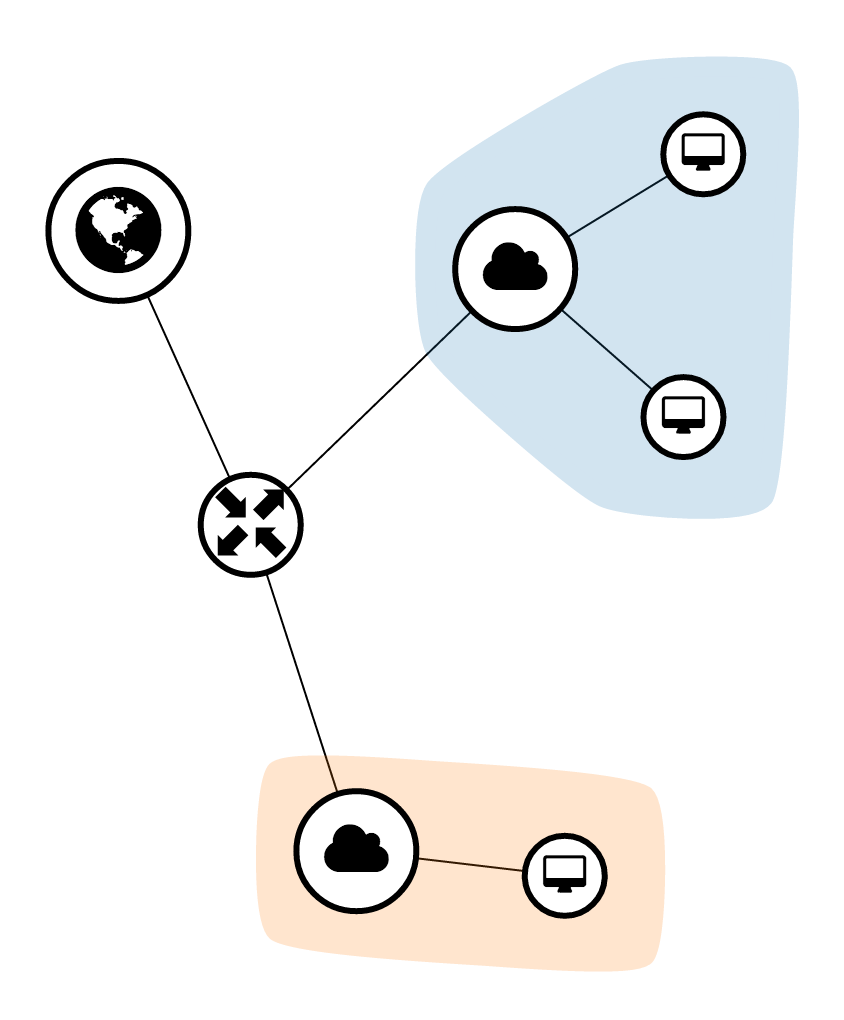
Now the network topology should look like the figure below if you check it in Horizon.
Create a security group to allow external access, and add it to the net-A-01 and net-B-01.
| Code Block | ||
|---|---|---|
| ||
neutron security-group-create allow-external
neutron security-group-rule-create --direction ingress --remote-ip-prefix 0.0.0.0/0 allow-external
neutron port-update [net-A-01 port UUID] --security-group [default-security-group UUID] --security-group allow-external
neutron port-update [net-B-01 port UUID] --security-group [default-security-group UUID] --security-group allow-external |
- Can ping from net-A-01 and net-B-01 to 8.8.8.8
- Can ping between net-A-01 and net-B-01
| Note |
|---|
Currently, SONA security group implementation has a small limitation that it does not allow ingress traffic via a connected session by default. So, you'll need to add allowing rule for ingress direction with remote address "0.0.0.0/0" explicitly for your VM to be able to access the Internet. |
Create a floating IP and associate it to net-A-01.
| Code Block | ||
|---|---|---|
| ||
neutron floatingip-create net-public
neutron floatingip-associate [floating-ip-id] [net-A-01 port UUID] |
- Can ping to net-A-01 with the associated floating IP from the external
Copy the network-cfg.json file to ~/onos/tools/package/config. If you updated or just copied the file, then you need to compile the onos again to distribute the network-json file.
...
Compile and install ONOS
| Code Block | ||
|---|---|---|
| ||
~/onos$ mcis
~/onos$ onos-package
~/onos$ onos-install -f $OC1 |
You need to set up you own cell information before you install the ONOS.
...
Login to the ONOS CLI and activate OpenstackSwitching application
| Code Block | ||
|---|---|---|
| ||
onos> app activate org.onosproject.openstackswitching |
...
You can see the three devices (control node and two compute nodes) from ONOS CLI, if everything has been configured successfully.
| Code Block | ||
|---|---|---|
| ||
onos> devices
id=of:0000000000000001, available=true, role=MASTER, type=SWITCH, mfr=Nicira, Inc., hw=Open vSwitch, sw=2.3.2, serial=None, managementAddress=10.40.101.116, protocol=OF_13, channelId=10.40.101.116:60019
id=of:0000000000000002, available=true, role=MASTER, type=SWITCH, mfr=Nicira, Inc., hw=Open vSwitch, sw=2.3.2, serial=None, managementAddress=10.40.101.176, protocol=OF_13, channelId=10.40.101.176:38230
id=of:0000000000000003, available=true, role=MASTER, type=SWITCH, mfr=Nicira, Inc., hw=Open vSwitch, sw=2.0.2, serial=None, managementAddress=10.40.101.156, protocol=OF_13, channelId=10.40.101.156:59094 |
...
Tutorials
...
Simple Workthrough
...