Due to a ransomware attack, the wiki was reverted to a July 2022 version. . We apologize for the lack of a more recent valid backup.
Work in progress...
Prerequsite
Please prepare four VMs or host machines with the following specification.
| No | usage | CPU | Memory | Disk |
|---|---|---|---|---|
| 1 | Openstack Controller Node | 2 Core | 4 GB or higher | 20 GB |
| 2 | Openstack Network Node | 1 Core | 1 GB | 20 GB |
| 3 | ONOS Controller | 1 Core | 1 GB | 20 GB |
| 4 | Compute Node | 1 Core | 2 GB or higher | 20 GB |
| 5 | Compute Node | 1 Core | 2 GB or higher | 20 GB |
Set up Control node
...
Install git and python-pip on the Openstack Controller node
| Code Block | ||
|---|---|---|
| ||
$ sudo apt-get install -y git
$ sudo apt-get install -y python-pip |
...
Install devstack on the Openstack Controller node
| Code Block | ||
|---|---|---|
| ||
$ git clone git://github.com/openstack-dev/devstack.git
or if you want to install the specific version of Devstack,
$ git clone -b stable/kilo git://github.com/openstack-dev/devstack.git |
Creates local.conf file using the following options
...
| language | text |
|---|
...
You will need:
- An ONOS cluster installed and running
- An OpenStack service installed and running ("stable/mitaka" version is used here)
OpenStack Setup
How to deploy OpenStack is out of scope of this documentation. Here, it only describes some configurations related to use SONA. All other settings are completely up to your environment.
Controller Node
Let's install networking-onos (Neutron ML2 plugin for ONOS) first.
| Code Block | ||
|---|---|---|
| ||
$ git clone https://github.com/openstack/networking-onos.git
$ cd networking-onos
$ sudo python setup.py install |
Specify ONOS access information. You may want to copy the config file to /etc/neutron/plugins/ml2/ where the other Neutron configuration files are.
| Code Block | ||||
|---|---|---|---|---|
| ||||
# Configuration options for ONOS ML2 Mechanism driver
[onos]
# (StrOpt) ONOS ReST interface URL. This is a mandatory field.
url_path = http://onos.instance.ip.addr:8181/onos/cordvtn
# (StrOpt) Username for authentication. This is a mandatory field.
username = onos
# (StrOpt) Password for authentication. This is a mandatory field.
password = rocks |
Next step is to install and run OpenStack services.
For DevStack users, use this sample DevStack local.conf to build OpenStack controller node. Make sure your DevStack branch is consistent with the OpenStack branches, "stable/mitaka" in this example.
| Code Block | ||
|---|---|---|
| ||
[[local|localrc]] HOST_IP=10.134.231.28 SERVICE_HOST=10.134.231.28 RABBIT_HOST=10.134.231.28 DATABASE_HOST=10.134.231.28 Q_HOST=10.134.231.28 ADMIN_PASSWORD=nova DATABASE_PASSWORD=$ADMIN_PASSWORD RABBIT_PASSWORD=$ADMIN_PASSWORD SERVICE_PASSWORD=$ADMIN_PASSWORD SERVICE_TOKEN=$ADMIN_PASSWORD DATABASE_TYPE=mysql # Log SCREEN_LOGDIR=/opt/stack/logs/screen # Images |
...
IMAGE_URLS="http:// |
...
cloud-images.ubuntu.com/releases/14.04/release/ubuntu-14.04-server-cloudimg-amd64.tar.gz,http://www.planet-lab.o rg/cord/trusty-server-multi-nic.img" FORCE_CONFIG_DRIVE=True # Networks Q_ML2_TENANT_NETWORK_TYPE=vxlan Q_ML2_PLUGIN_MECHANISM_DRIVERS=onos_ml2 Q_PLUGIN_EXTRA_CONF_PATH= |
...
/opt/stack/networking-onos/etc Q_PLUGIN_EXTRA_CONF_FILES=(conf_onos.ini) |
...
NEUTRON_CREATE_ |
...
INITIAL_ |
...
NETWORKS=False # Services enable_service q-svc disable_service n-net disable_service n-cpu disable_service tempest disable_service c-sch disable_service c-api disable_service c-vol # Branches |
...
GLANCE_BRANCH=stable/mitaka
HORIZON_BRANCH=stable/mitaka
KEYSTONE_BRANCH=stable/mitaka
NEUTRON_BRANCH=stable/mitaka
NOVA_BRANCH=stable/mitaka |
If you use other deploy tools or build the controller node manually, please set the following configurations to Nova and Neutron configuration files.
1. Set Neutron to use ONOS ML2 plugin.
* The IP address 1.1.1.1 needs to be changed to your host IP address of Openstack controller.
* You can choose a different admin password if you want.
* If you installed the onos ml2 plugin in a different place, you need to change the Q_PLUGIN_EXTRA_CONF_PATH properly.
...
| Code Block | ||
|---|---|---|
|
...
 $ git clone https://github.com/openstack/networking-onos.git
 $ cd networking-onos
 ~/networking-onos$ sudo python setup.py install
If you find the following error, please install python-setuptools using apt-get.
| Code Block | ||
|---|---|---|
| ||
Traceback (most recent call last):
  File "setup.py", line 17, in <module>
    import setuptools
ImportError: No module named setuptools |
| Code Block | ||
|---|---|---|
| ||
$ sudo apt-get install python-setuptools |
| Info | ||
|---|---|---|
| ||
onos-networking plugin just forwards (or calls) REST calls from nova to ONOS, and OpenstackSwitching app receives the API calls and returns OK. Main functions to implement the virtual networks are handled in OpenstackSwitching application. |
...
Configure the onos ml2 plugin by editing the conf_onos.ini file in networking-onos/etc folder, which is just created
| Code Block | ||
|---|---|---|
| ||
#Configuration options for ONOS driver

[onos]
# (StrOpt) ONOS ReST interface URL. This is a mandatory field.
url_path = http://ONOS_HOST_IP:8181/onos/openstackswitching

# (StrOpt) Username for authentication. This is a mandatory field.
username = onos

# (StrOpt) Password for authentication. This is a mandatory field.
password = rocks |
You need to set the proper IP address for ONOS controller in ONOS_HOST_IP
...
Set up devstack
| Code Block | ||
|---|---|---|
| ||
~/devstack$ ./stack.sh |
It would take quite long up to 1 hour depending on the network status and host performance. If it is setup correctly, you will see the following message.
| Code Block | ||
|---|---|---|
| ||
========================
DevStack Components Timed
========================

apt-get-update - 6 secs
pip_install - 31 secs
apt-get - 3 secs


This is your host IP address: 10.40.101.209
This is your host IPv6 address: ::1
Horizon is now available at http://10.40.101.209/dashboard
Keystone is serving at http://10.40.101.209:5000/
The default users are: admin and demo
The password: nova
2015-12-10 07:32:04.411 | stack.sh completed in 243 seconds. |
Please check if you can log in to the Horizon dashboard with the url and login information as below.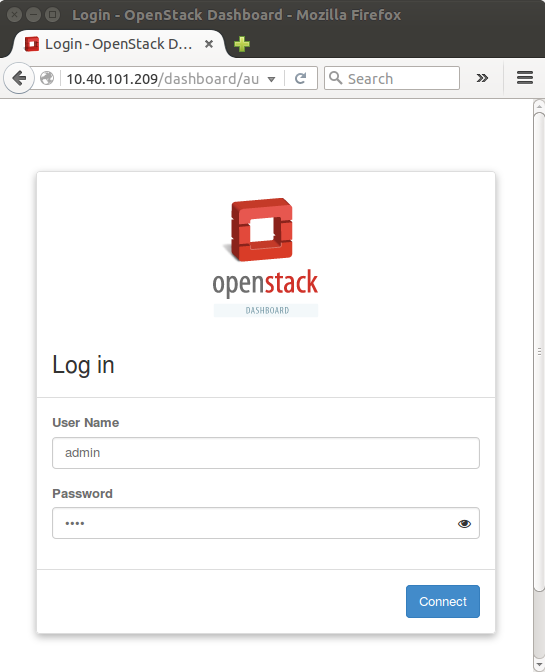
Set up Compute node
Install Openvswitch
Even though any version higher than 2.0 would work, but we have tested with 2.3.2.
| Code Block | ||
|---|---|---|
| ||
$ wget http://openvswitch.org/releases/openvswitch-2.3.2.tar.gz
$ tar xzvf openvswitch-2.3.2.tar.gz
$ cd openvswitch-2.3.2/
~/openvswitch-2.3.2$ ./configure
~/openvswitch-2.3.2$ make
~/openvswitch-2.3.2$ sudo make install
~/openvswitch-2.3.2$ sudo modprobe openvswitch |
You can check if openvswitch is loaded properly
...
| language | bash |
|---|
...
| |||
core_plugin = neutron.plugins.ml2.plugin.Ml2Plugin
dhcp_agent_notification = False |
| Code Block | ||
|---|---|---|
| ||
[ml2]
tenant_network_types = vxlan
type_drivers = vxlan
mechanism_drivers = onos_ml2

[securitygroup]
enable_security_group = True |
2. Set Nova to use config drive for metadata service, so that we don't need to launch Neutron metadata-agent.
And of course, set to use Neutron for network service.
| Code Block | ||
|---|---|---|
| ||
[DEFAULT]
force_config_drive = True
network_api_class = nova.network.neutronv2.api.API
security_group_api = neutron

[neutron]
url = http://[controller_ip]:9696
auth_strategy = keystone
admin_auth_url = http://[controller_ip]:35357/v2.0
admin_tenant_name = service
admin_username = neutron
admin_password = [admin passwd] |
3. Don't forget to specify conf_onos.ini when you start Neutron service.
| Code Block |
|---|
/usr/bin/python /usr/local/bin/neutron-server --config-file /etc/neutron/neutron.conf --config-file /etc/neutron/plugins/ml2/ml2_conf.ini --config-file /opt/stack/networking-onos/etc/conf_onos.ini |
Set up Compute and Gateway node
No special configurations are required for compute or gateway other than setting network api to Neutron.
For DevStack users, here's sample DevStack local.conf.
| Code Block | ||
|---|---|---|
| ||
[[local|localrc]]
HOST_IP=10.134.231.30  <-- local IP
SERVICE_HOST=162.243.x.x  <-- controller IP, must be reachable from your test browser for console access from Horizon
RABBIT_HOST=10.134.231.28
DATABASE_HOST=10.134.231.28

ADMIN_PASSWORD=nova
DATABASE_PASSWORD=$ADMIN_PASSWORD
RABBIT_PASSWORD=$ADMIN_PASSWORD
SERVICE_PASSWORD=$ADMIN_PASSWORD
SERVICE_TOKEN=$ADMIN_PASSWORD

DATABASE_TYPE=mysql

NOVA_VNC_ENABLED=True
VNCSERVER_PROXYCLIENT_ADDRESS=$HOST_IP
VNCSERVER_LISTEN=$HOST_IP

LIBVIRT_TYPE=kvm
# Log
SCREEN_LOGDIR=/opt/stack/logs/screen

# Services
ENABLED_SERVICES=n-cpu,neutron

# Branches
NOVA_BRANCH=stable/mitaka
KEYSTONE_BRANCH=stable/mitaka
NEUTRON_BRANCH=stable/mitaka |
| Note |
|---|
If your compute node is a VM, try http://docs.openstack.org/developer/devstack/guides/devstack-with-nested-kvm.html this first or set |
For manual set ups, set Nova to use Neutron as a network API.
| Code Block | ||
|---|---|---|
| ||
[DEFAULT]
force_config_drive = always
network_api_class = nova.network.neutronv2.api.API
security_group_api = neutron

[neutron]
url = http://[controller_ip]:9696
auth_strategy = keystone
admin_auth_url = http://[controller_ip]:35357/v2.0
admin_tenant_name = service
admin_username = neutron
admin_password = [admin passwd] |
Additional compute and gateway node setup
1. Make sure your OVS version is 2.3.0 or later.
2. Set OVSDB listening mode in your compute nodes. There are two ways.
| Code Block |
|---|
$ ovs-appctl -t ovsdb-server ovsdb-server/add-remote ptcp:6640:host_ip |
Or you can make the setting permanent by adding the following line to /usr/share/openvswitch/scripts/ovs-ctl, right after "set ovsdb-server "$DB_FILE" line. You need to restart the openvswitch-switch service.
| Code Block |
|---|
set "$@" --remote=ptcp:6640 |
In either way, you should be able to see port "6640" is in listening state.
| Code Block | ||
|---|---|---|
| ||
$ netstat -ntl Active Internet connections (only servers) Proto Recv-Q Send-Q Local Address |
...
Foreign Address |
...
State tcp 0 |
...
0 |
...
0.0.0.0:22 0.0.0.0:* |
...
|
...
|
...
LISTEN tcp |
...
0 |
...
|
...
0 0.0.0.0:6640 0.0.0.0:* |
...
|
...
|
...
LISTEN tcp6 |
...
|
...
Set up OVS
Please see the following link for detail, but here are the simple way to set up the OVS.
https://github.com/openvswitch/ovs/blob/master/INSTALL.md
...
| language | bash |
|---|
...
0 0 :::22 |
2. Check your OVSDB. It is okay If there's a bridge with name "br-int", but note that CORD-VTN will add or update its controller, DPID, and fail mode.
| Code Block |
|---|
$ sudo ovs-vsctl show
cedbbc0a-f9a4-4d30-a3ff-ef9afa813efb
ovs_version: "2.3.0" |
3. Make sure that ONOS user(sdn by default) can SSH from ONOS instance to compute nodes with key.
TODO: Add additional gateway node setups if required
ONOS Setup
How to deploy ONOS is out of scope of this documentation.
1. If your ONOS is ready, create network-cfg.json file to configure SONA apps.
| Code Block | ||
|---|---|---|
| ||
{ "userDefined" : { "openstacknetworking" : { |
...
"config" : { "physicalRouterMac" : "00:00:00:00:00:01", |
...
|
...
"gatewayBridgeId" : "of:00000000000000a3", |
...
|
...
"gatewayExternalInterfaceName" : "veth1", "gatewayExternalInterfaceMac" |
...
: "00:00:00:00:00:01", "nodes" : [ |
...
|
...
|
...
|
...
|
...
|
...
|
...
|
...
|
...
You can check if it is installed correctly
| Code Block | ||
|---|---|---|
| ||
~/openvswitch-2.3.2$ sudo ovs-vsctl --version
ovs-vsctl (Open vSwitch) 2.3.2
Compiled Dec  3 2015 14:49:51
DB Schema 7.6.2 |
Set manager as ptcp:6640 so that ONOS can detect the OVSDB
| Code Block | ||
|---|---|---|
| ||
~/openvswitch-2.3.2$ sudo ovs-vsctl set-manager ptcp:6640 |
...
Install devstack on the Compute node
| Code Block | ||
|---|---|---|
| ||
$ git clone git://github.com/openstack-dev/devstack.git |
...
Please use the following local.conf for the compute nodes
| Code Block | ||
|---|---|---|
| ||
[[local|localrc]]
HOST_IP=2.2.2.2
SERVICE_HOST=1.1.1.1
RABBIT_HOST=1.1.1.1
DATABASE_HOST=1.1.1.1
Q_HOST=1.1.1.1

ADMIN_PASSWORD=nova
DATABASE_PASSWORD=$ADMIN_PASSWORD
RABBIT_PASSWORD=$ADMIN_PASSWORD
SERVICE_PASSWORD=$ADMIN_PASSWORD
SERVICE_TOKEN=$ADMIN_PASSWORD

DATABASE_TYPE=mysql

#Images
IMAGE_URLS="http://download.cirros-cloud.net/0.3.4/cirros-0.3.4-x86_64-disk.img"
# Log

NOVA_VNC_ENABLED=true
VNCSERVER_PROXYCLIENT_ADDRESS=$HOST_IP
VNCSERVER_LISTEN=$HOST_IP

SCREEN_LOGDIR=/opt/stack/logs/screen

LIBVIRT_TYPE=qemu

# Services
ENABLED_SERVICES=n-cpu,neutron |
HOST_IP should be the IP address of the compute node host, and Controller node IP address needs to be set for other settings.
...
Set up Gateway node
Instead of Neutron Network Node, SONA implements 'Gateway Node' to process all of requred functions (e.t.c, pnat, floactingIP, ...) based on 'pure' open vSwitch.
For now, in the Falcon release, SONA only supports a single Gateway Node. We will support multiple Gateway's which gives scalability in the Goldeneye release.
Install Openvswitch
Even though any version higher than 2.0 would work, but we have tested with 2.3.2.
| Code Block | ||
|---|---|---|
| ||
$ wget http://openvswitch.org/releases/openvswitch-2.3.2.tar.gz
$ tar xzvf openvswitch-2.3.2.tar.gz
$ cd openvswitch-2.3.2/
~/openvswitch-2.3.2$ ./configure
~/openvswitch-2.3.2$ make
~/openvswitch-2.3.2$ sudo make install
~/openvswitch-2.3.2$ sudo modprobe openvswitch |
You can check if openvswitch is loaded properly
...
| language | bash |
|---|
...
{ "dataPlaneIp" : "10.134.34.222", "bridgeId" : "of:00000000000000a1" }, { "dataPlaneIp" : "10.134.34.223", "bridgeId" : "of:00000000000000a2" }, { "dataPlaneIp" : "10.134.33.208", "bridgeId" : "of:00000000000000a3" } ] } } }, "apps" : { "org.onosproject.openstackinterface" : { "openstackinterface" : { "neutronServer" : "http://10.243.139.46:9696/v2.0/", "keystoneServer" : "http://10.243.139.46:5000/v2.0/", "userName" : "admin", "password" : "nova" } }, "org.onosproject.openstacknode" : { "openstacknode" : { "nodes" : [ { "hostname" : "compute-01", "ovsdbIp" : "192.168.56.112", "ovsdbPort" : "6640", "bridgeId" : "of:00000000000000a1", "openstackNodeType" : "COMPUTENODE" }, { "hostname" : "compute-02", "ovsdbIp" : "192.168.56.106", "ovsdbPort" : "6640", |
...
|
...
|
...
|
...
"bridgeId" |
...
: "of:00000000000000a2", |
...
|
...
|
...
|
...
"openstackNodeType" |
...
: |
...
"COMPUTENODE" |
...
|
...
|
...
}, |
...
...
|
...
Set up OVS
Please see the following link for detail, but here are the simple way to set up the OVS.
https://github.com/openvswitch/ovs/blob/master/INSTALL.md
...
| language | bash |
|---|
...
{ "hostname" : "network", |
...
...
"ovsdbIp" : "192.168.56.108", |
...
|
...
"ovsdbPort" : "6640", |
...
|
...
|
...
|
...
|
...
You can check if it is installed correctly
| Code Block | ||
|---|---|---|
| ||
~/openvswitch-2.3.2$ sudo ovs-vsctl --version
ovs-vsctl (Open vSwitch) 2.3.2
Compiled Dec  3 2015 14:49:51
DB Schema 7.6.2 |
Set manager as ptcp:6640 so that ONOS can detect the OVSDB
| Code Block | ||
|---|---|---|
| ||
~/openvswitch-2.3.2$ sudo ovs-vsctl set-manager ptcp:6640 |
...
Add port which is connected to a physical router to br-int bridge
| Code Block | ||
|---|---|---|
| ||
~/openvswitch-2.3.2$ sudo ovs-vsctl add-port br-int eth0 |
(Optional) If you construct Gateway Node environment using virtualbox and only have an option to use NAT interface for internet connection, don't worry there's the way as follows,
Create virtual ports
| Code Block | ||
|---|---|---|
| ||
~/openvswitch-2.3.2$ sudo ip link add dev veth0 type veth peer name veth1
~/openvswitch-2.3.2$ sudo ip link set dev veth0 up
~/openvswitch-2.3.2$ sudo ip link set dev veth1 up |
...
| Code Block | ||
|---|---|---|
| ||
~/openvswitch-2.3.2$ sudo ip link add lbr-ex type bridge |
...
| Code Block | ||
|---|---|---|
| ||
~/openvswitch-2.3.2$ sudo ovs-vsctl add-port br-int veth0 |
...
| Code Block | ||
|---|---|---|
| ||
~/openvswitch-2.3.2$ sudo ip link set veth1 master lbr-ex |
...
| Code Block | ||
|---|---|---|
| ||
~/openvswitch-2.3.2$ sudo ip addr add 172.24.4.1/24 dev lbr-ex
~/openvswitch-2.3.2$ sudo ip link set lbr-ex up |
...
| Code Block | ||
|---|---|---|
| ||
~/openvswitch-2.3.2$ sudo sysctl net.ipv4.ip_forward=1 |
...
| Code Block | ||
|---|---|---|
| ||
~/openvswitch-2.3.2$ sudo iptables -t nat -A POSTROUTING -o eth0 -j MASQUERADE |
...
| language | bash |
|---|
...
"bridgeId" : "of:00000000000000a3", "openstackNodeType" : "GATEWAYNODE", "gatewayExternalInterfaceName" : "eth1", "gatewayExternalInterfaceMac" : "00:00:00:00:00:10" } |
...
] |
...
|
...
|
...
|
...
|
...
} } |
...
}, "devices" |
...
: { "of:00000000000000a1" |
...
: { |
...
|
...
"basic" : { |
...
|
...
|
...
"driver" : "sona" |
...
|
...
} |
...
|
...
}, |
...
"of:00000000000000a2" : { |
...
"basic" : { |
...
|
...
"driver" : "sona" |
...
|
...
|
...
|
...
|
...
|
...
|
...
|
...
|
...
 }
        }
    }
} |
NOT MERGED YET: will be updated to below
| Code Block | ||
|---|---|---|
| ||
{
    "apps" : {
        "org.onosproject.openstackinterface" : {
            "openstackinterface" : {
                 "neutronServer" : "http://10.243.139.46:9696/v2.0/",
                 "keystoneServer" : "http://10.243.139.46:5000/v2.0/",
|
Set up ONOS node
We recommend to follow the link to set up the ONOS node and set up the ONOS development environment : ONOS from Scratch. However, you can also follow the following steps only to set up the ONOS node.
Log into your new VM as sdn and give the user passwordless sudo privileges. Run
sudo visudo, and add the following line to the end of the file:Code Block language text USER_ID ALL=(ALL) NOPASSWD:ALLInstall Java 8
Code Block language bash $ sudo apt-get install software-properties-common -y $ sudo add-apt-repository ppa:webupd8team/java -y $ sudo apt-get update $ sudo apt-get install oracle-java8-installer oracle-java8-set-default -y- Set up the public key login either using onos-push-keys or copying your public key of your development host to ONOS node
Bootstrap Compute/Gateway nodes
Using OpenstackNode application, you can initialize OVS in Compute/Gateway nodes as below,
- Makes OVSDB and OpenFlow1.3 connection between ONOS and each node
- Makes Bridge 'br-int' on each node
- Makes port for vxlan tunneling
The application reads node information from network config,
| Code Block | ||
|---|---|---|
| ||
{ "apps" : { "org.onosproject.openstackinterfaceuserName" : { "admin", "openstackinterfacepassword" : { "nova" } }, "neutronServer" : "http://10.243.139.46:9696/v2.0/", org.onosproject.openstacknode" : { "keystoneServeropenstacknode" : "http://10.243.139.46:5000/v2.0/",{ "userNamenodes" : "admin",[ "password" : "nova" { } }, "org.onosproject.openstacknodehostname" : {"compute-01", "openstacknode" : { "nodestype" : ["COMPUTE", { "managementIp" : "10.203.25.244", "hostnamedataIp" : "compute-0110.134.34.222", "ovsdbIpintegrationBridge" : "192.168.56.112", of:00000000000000a1" }, "ovsdbPort" : "6640", { "bridgeIdhostname" : "of:0000000000000001compute-02", "openstackNodeTypetype" : "COMPUTENODECOMPUTE", } "managementIp" : "10.203.229.42", { "dataIp" : "10.134.34.223", "hostnameintegrationBridge" : "compute-02of:00000000000000a2", }, "ovsdbIp" : "192.168.56.106", { "ovsdbPorthostname" : "6640gateway-01", "bridgeIdtype" : "of:0000000000000002GATEWAY", "openstackNodeTypemanagementIp" : "COMPUTENODE" 10.203.198.125", } "dataIp" : "10.134.33.208", { "integrationBridge" : "of:00000000000000a3", "hostnamerouterBridge" : "network", of:00000000000000b3", }, "ovsdbIp" : "192.168.56.108", { "ovsdbPorthostname" : "6640gateway-02", "bridgeIdtype" : "of:0000000000000003GATEWAY", "openstackNodeTypemanagementIp" : "GATEWAYNODE10.203.198.131", "gatewayExternalInterfaceNamedataIp" : "eth110.134.33.209", "gatewayExternalInterfaceMacintegrationBridge" : "00:00:00:00:00:10"of:00000000000000a4", } "routerBridge" : "of:00000000000000b4", ] } } } } |
After activating OpenstackNode application with above config, you can see each node is automatically initialized as below,
| Code Block | ||
|---|---|---|
| ||
Welcome to Open Network Operating System (ONOS)!] ____ _ ______ ____} /} __ \/ |/ /}, __ \/ __/ "devices" : { / /_/ / "of:00000000000000a1" / /_/ /\ \: { \____/_/|_/\____/___/ "basic" : { "driver" : "sona" } Documentation: wiki.onosproject.org }, Tutorials: tutorials.onosproject.org Mailing lists"of: lists.onosproject.org Come help out! Find out how at: contribute.onosproject.org Hit '<tab>' for a list of available commands and '[cmd] --help' for help on a specific command. Hit '<ctrl-d>' or type 'system:shutdown' or 'logout' to shutdown ONOS. onos> app activate org.onosproject.openstacknode onos> mcpark@compute1:~$ sudo ovs-vsctl show 550f58e0-b328-4002-a3e4-54571585ae5c Manager "ptcp:6640" Bridge br-int Controller "tcp:192.168.56.107:6653" fail_mode: secure Port vxlan Interface vxlan type: vxlan options: {key=flow, remote_ip=flow} Port br-int Interface br-int |
Note that OpenstackNode application is independent from SONA Application which means that you can activate the application only when you need initialization.
00000000000000a2" : {
            "basic" : {
                "driver" : "sona"
            }
        }
    }
} |
2. Make sure the following ONOS applications are started successfully.
| Code Block |
|---|
ONOS_APPS=drivers,drivers.ovsdb,openflow-base,ovsdb-base,dhcp,openstacknode,openstackswitching,openstackrouting,openstackinterface |
3. Push the network config file to ONOS.
| Code Block |
|---|
curl --user onos:rocks -X POST -H "Content-Type: application/json" http://onos-01:8181/onos/v1/network/configuration/ -d @network-cfg.json |
NOT MERGED YET: 4. Check all your compute and gateway nodes are in COMPLETE state in ONOS CLI.
| Code Block |
|---|
onos> openstack-nodes
hostname=compute-01, type=COMPUTE, managementIp=45.55.25.244, dataIp=10.134.34.222, intBridge=of:00000000000000a1, routerBridge=Optional.empty init=INCOMPLETE
hostname=compute-02, type=COMPUTE, managementIp=192.241.229.42, dataIp=10.134.34.223, intBridge=of:00000000000000a2, routerBridge=Optional.empty init=COMPLETE
hostname=gateway-01, type=GATEWAY, managementIp=159.203.198.125, dataIp=10.134.33.208, intBridge=of:00000000000000a3, routerBridge=Optional[of:00000000000000b3] init=COMPLETE
hostname=gateway-02, type=GATEWAY, managementIp=159.203.198.131, dataIp=10.134.33.209, intBridge=of:00000000000000a4, routerBridge=Optional[of:00000000000000b4] init=COMPLETE
Total 4 nodes |
It's done. Enjoy.
NOT MERGED YET: CLI Commands
| Command | Usage | Description |
|---|---|---|
| openstack-nodes | openstack-nodes | Shows the list of compute and gateway nodes that registered to openstack node service |
| openstack-node-check | openstack-node-check [hosthame] | Shows the state of each node bootstrap steps |
| openstack-node-init | openstack-node-init [hostname] | Try to re-initialize a given node. It's no harm to re-initialize already in COMPLETE state. |
...