Due to a ransomware attack, the wiki was reverted to a July 2022 version. . We apologize for the lack of a more recent valid backup.
...
Lets send Host-to-Host Intent to ONOS using GUI. To do so, click on first host and then press left-shift key and click on second host while keep holding the left-shift key. Small window will appear on the right top corner under "ONOS-Summary" window stating "Selected Nodes" as show in figure. For example purpose I have selected hosts with IP=10.0.0.1 (h1) and IP=10.0.0.2 (h2).
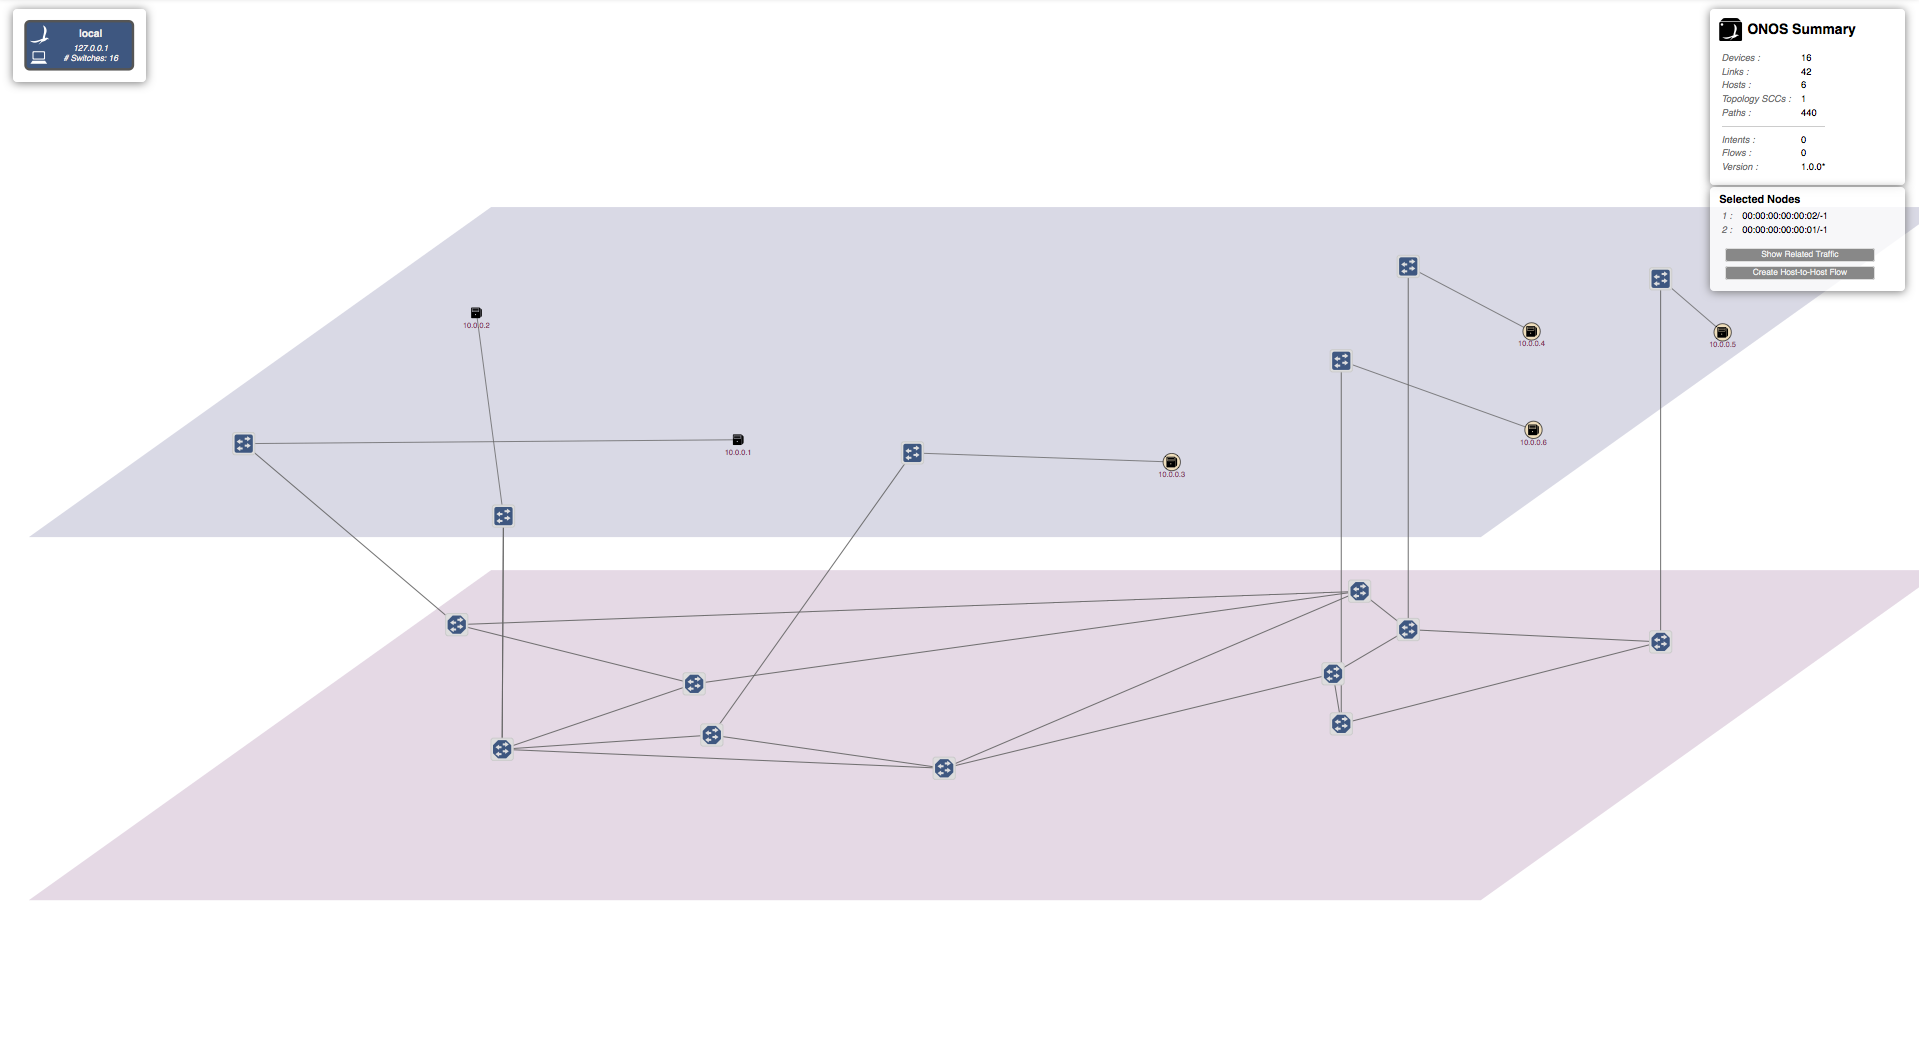
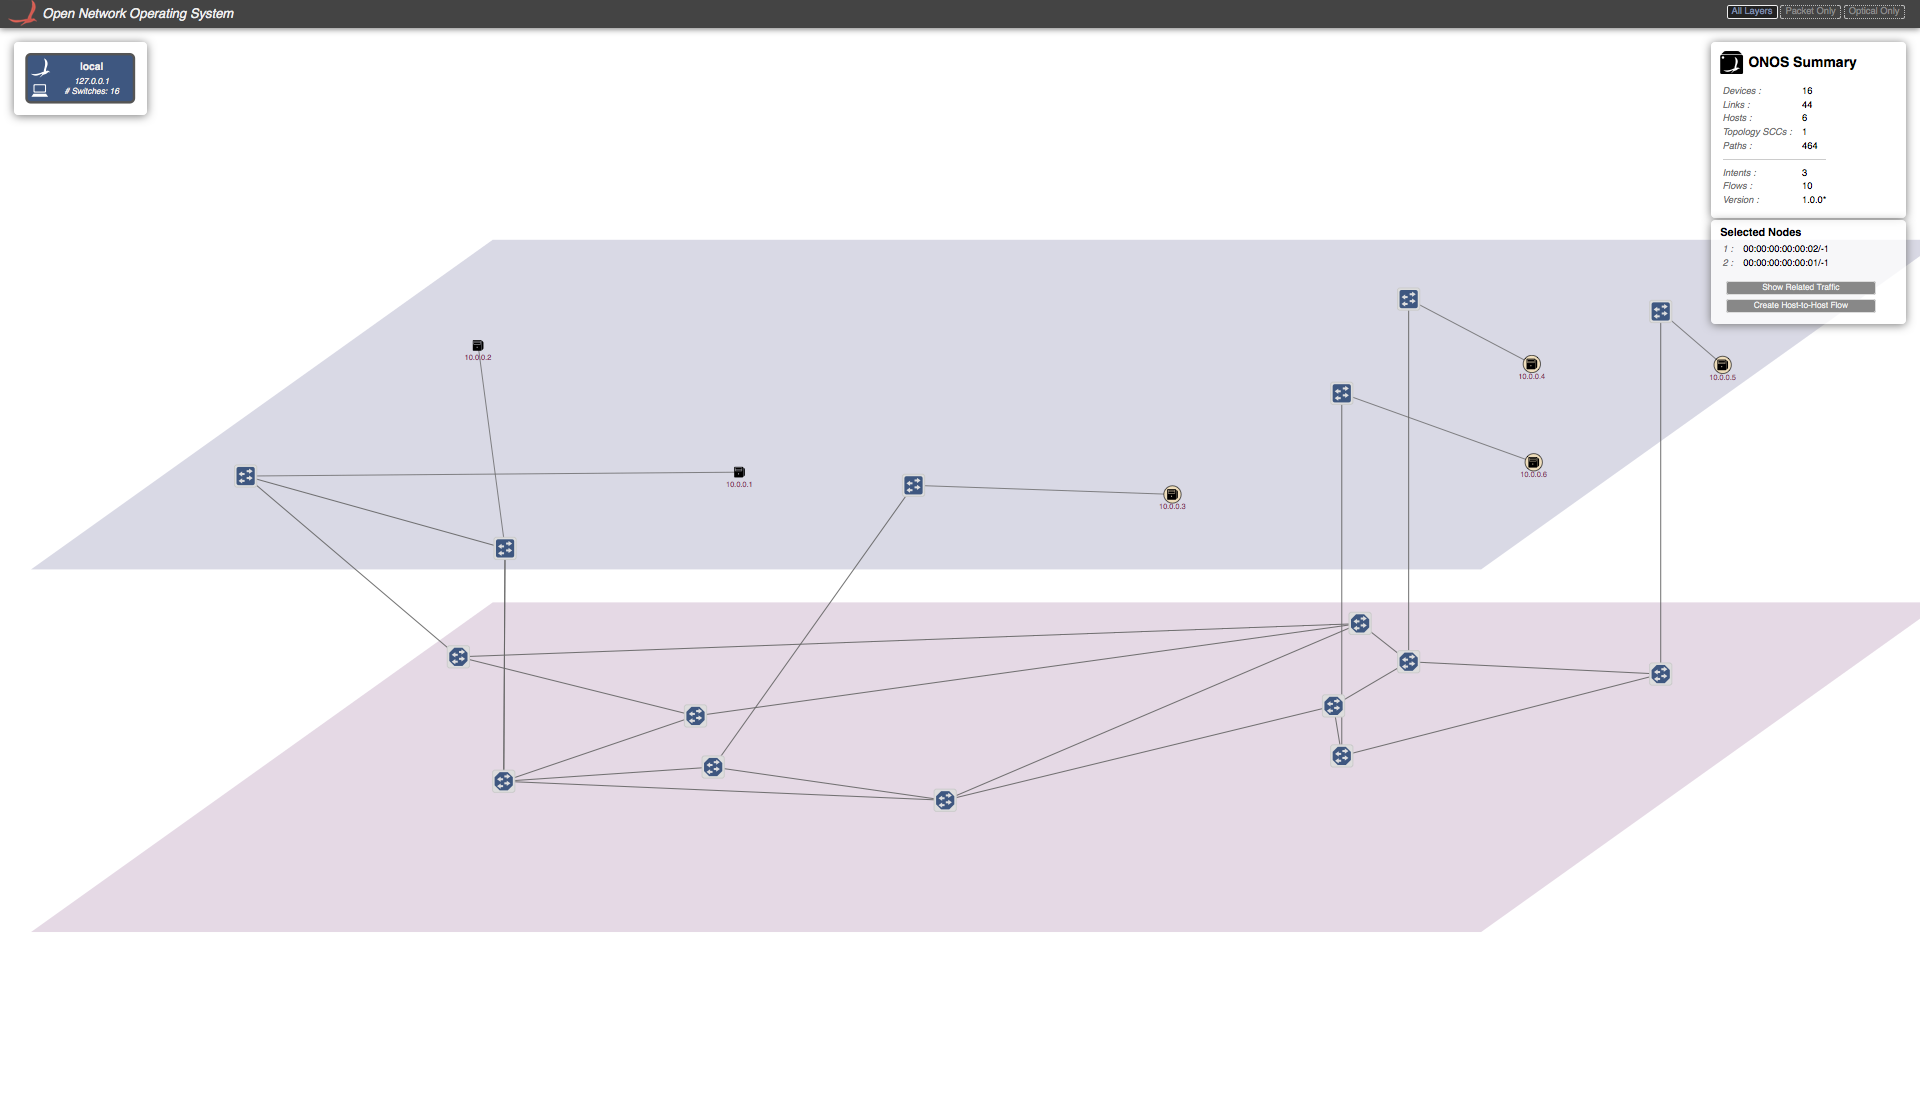
Click on "Host-to-Host flow" in "Selected Nodes" window. This send Host-to-Host intend to ONOS. ONOS will discover that there is no direct link between two corresponding packet switches but they can be reachable through optical-layer and hence setup path through optical layer. A virtual direct link will created between these packet switches in the GUI as shown in the figure below.
Now if you send traffic between these host you will see traffic is going through successfully. Note in this tutorial script we have only create one tap interface per packet-optical switch. Which means we cannot setup more then one connection per switch. If you want more then one connection per switch you need to add tap interface accordingly in "opticalTest.py".
Demo 2: Establishing connection between hosts/DataCenters using ONOS-CLI.
You can send Host-to-Host intent using ONOS-CLI too. To do so you have to write following command in ONOS-CLI command prompt. For example purpose I have chosen h3 and h4
| Info | ||
|---|---|---|
| ||
onos> add-host-intent 00:00:00:00:00:03/-1 00:00:00:00:00:04/-1 |
You will again see the direct virtual link been setup between the switches corresponding to h3 and h4.
There is an other way to send Host-to-Host Intent to ONOS with specified bandwidth using BandwidthCalendaring app but this is out scope of this tutorial.
Possible demo scenarios
GUI representing the topology
...