Due to a ransomware attack, the wiki was reverted to a July 2022 version. . We apologize for the lack of a more recent valid backup.
| Table of Contents |
|---|
(Work in progress...)
Overview
The Topology View provides a visual (cluster-wide) overview of the network topology controlled by ONOS. When the topology view is instantiated it establishes a websocket connection with the server (ONOS instance to which it is connected) and exchanges "event" messages to determine the topology state. The view is thus event-driven, with events such as addDevice, addLink, addHost, updateDevice, etc.
...
Additionally, pressing the 'L' key will cycle through the devices labels ("friendly", "ID" "no-label"):

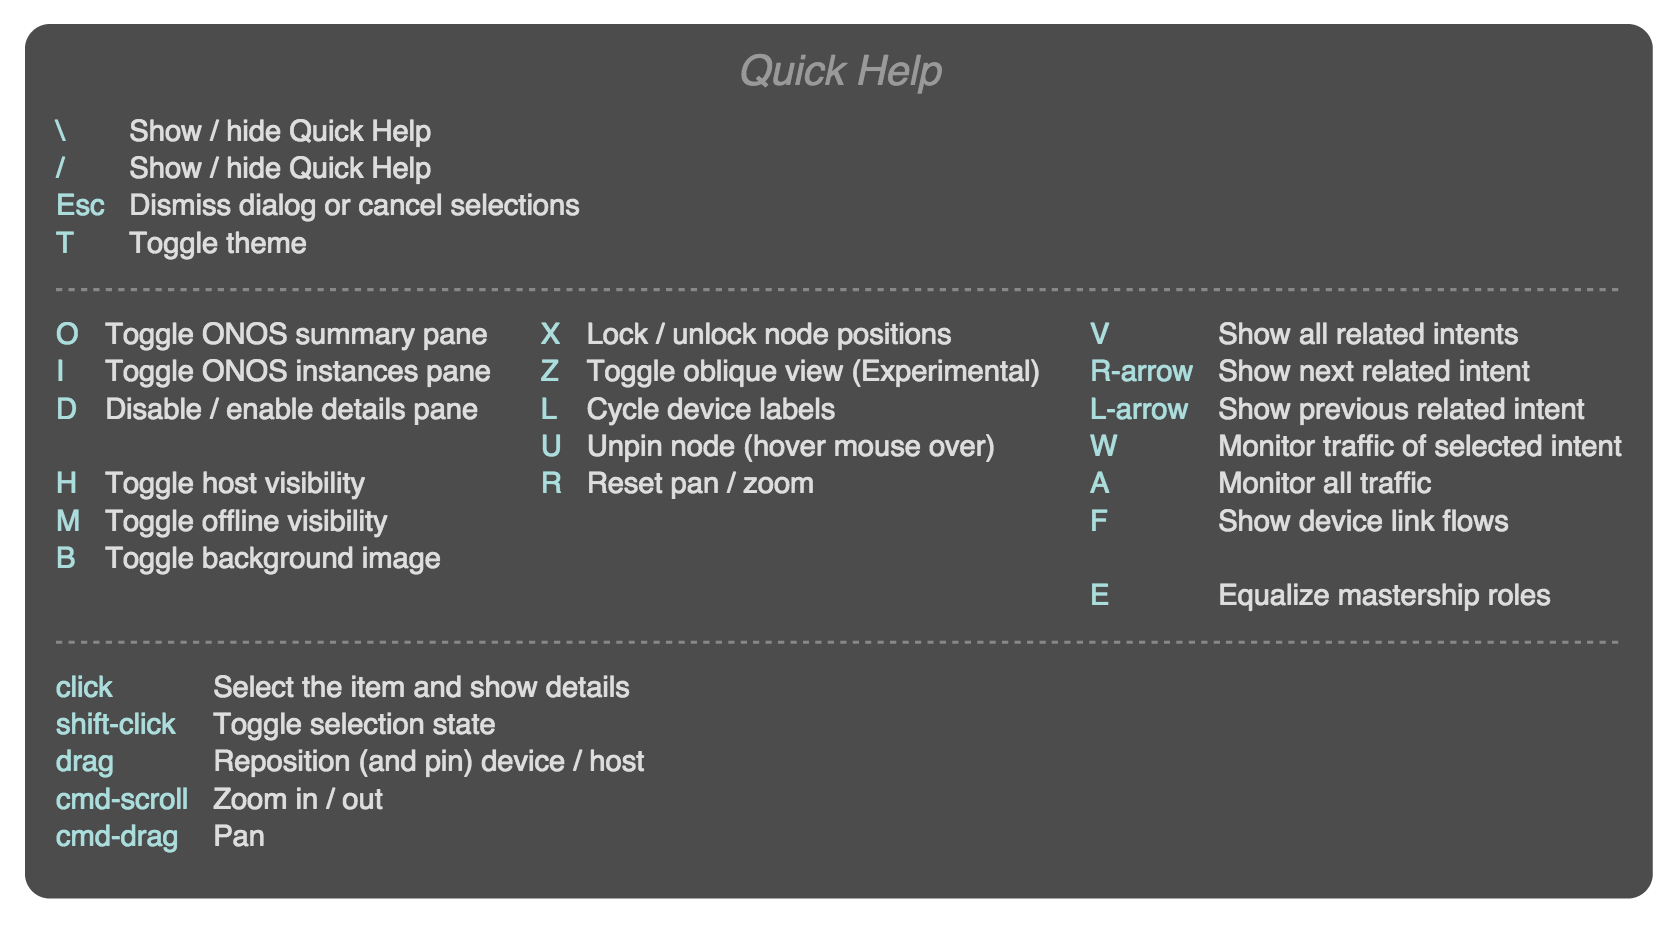
Quick Help
By this point you have probably realized that there are a number of "keystroke commands" that can be applied to the topology view. These commands are summarized in a Quick Help panel which can be displayed by pressing the slash '/' or backslash '\' key. Pressing either of these keys again (or pressing the Escape key) will dismiss the panel.
...
Mouse Gestures
A node (device/host) may be manually repositioned (and pinned into place) by clicking on it and dragging it to a new location.
NOTE: To unpin a pinned node, hover the mouse over the node and press the 'U' (Unpin) key.
Clicking on a node will select it (and deselect any other selections). Details of the selected node will appear in the Details Panel. the details panel. Note that action buttons relating to the selection are provided at the bottom of the panel.
Multiple selections may be achieved by holding down the Shift key while clicking on a node - this toggles the selection state of that node.
Pressing the Escape key will clear the current selection.
Panning and zooming the topology is achieved with The view may be panned with Cmd-drag (or Alt-drag) , and zoomed with Cmd-scroll (or Alt-scroll) gestures. Pressing the 'R' key will reset pan/zoom to the default values.
Details Panel
The details panel appears when something of interest is "selected".
Miscellaneous Controls
...
When a single device is selected, properties of that device are displayed, along with two action buttons:
- Show Related Traffic
- Show Device Flows

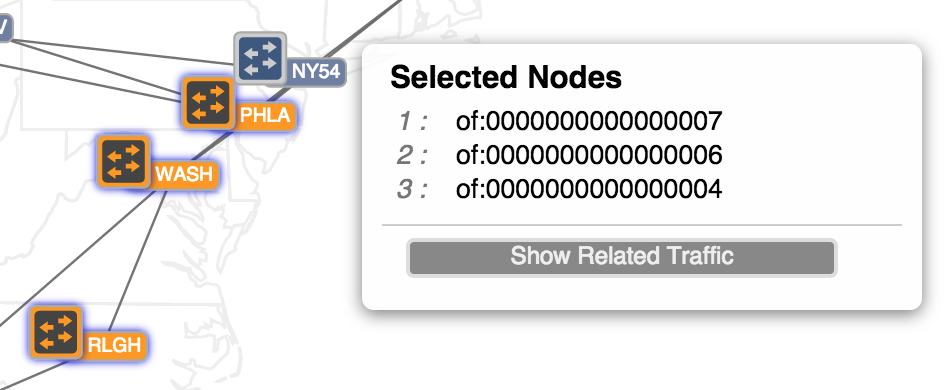
When multiple devices are selected, the details panel switches format to show the IDs of the selections and provides a single action button:
- Show Related Traffic
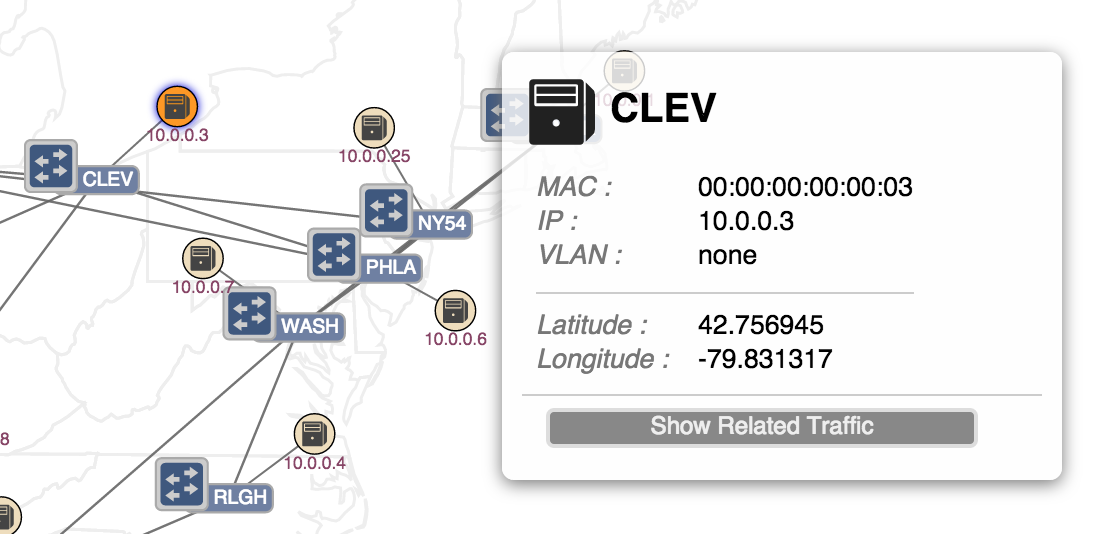
When a single host is selected, properties of that host are displayed, along with an action button:
- Show Related Traffic
When exactly two hosts are selected, their IDs are shown, along with the following action buttons:
- Show Related Traffic
- Create Host-to-Host Flow

...
Installing an intent between Hosts
Selecting two hosts and pressing the 'Create Host-to-Host Flow' action button on the details panel. (todo)
Visualizing Traffic
Related intents (TODO)
- Related intents (next/prev)
- Monitor traffic of selected intent
- Monitor all traffic
- Show device link flows
Quick Help
By this point you have probably realized that there are a number of "keystroke commands" that can be applied to the topology view. These commands are summarized in a Quick Help panel which can be displayed by pressing the slash '/' or backslash '\' key. Pressing either of these keys again (or pressing the Escape key) will dismiss the panel.
The available commands listed in this panel are described in other sections of this page.
Miscellaneous Controls
(TODO)
- M - Toggle offline device visibility
- E - Equalize mastership roles