Due to a ransomware attack, the wiki was reverted to a July 2022 version. . We apologize for the lack of a more recent valid backup.
...
This tutorial will step you through the process of creating an application that does just that - injects a – injects a tabular view into the ONOS GUI.
A fictitious company, "Meowster, Inc." is used throughout the examples. This tutorial assumes you have created a top level directory and changed into it:
| Code Block |
|---|
$ mkdir meow
$ cd meow |
Application Set Up
Setting up the application follows the same process as for the Custom View tutorial, with just a few minor differences.
(0) Create a working directory
| Code Block |
|---|
$ mkdir table
$ cd table |
(1) Create the main application
tutorial builds on top of the Custom View tutorial (although you could create a tabular view for your app without the need for the custom view too).
Let's get started...
Adding a Tabular View to our App
First of all, let's go back to the top level directory for our sample application:
| Code Block |
|---|
$ cd ~/meow/sample |
Now we can overlay the sample table view by using the uitab archetype:
| Code Block |
|---|
$ onos-create-app appuitab org.meowster.app.tablesample meowster-tablesample |
When asked for the version, accept the suggested default: 1.0-SNAPSHOT, and press enter.
When asked to confirm the properties configuration, press enter.
| Code Block | ||
|---|---|---|
| ||
groupId: org.meowster.app.table
artifactId: meowster-table
version: 1.0-SNAPSHOT
package: org.meowster.app.table |
(2) Overlay the UI additional components, using the uitab archetype:
| Code Block |
|---|
$ onos-create-app uitab org.meowster.app.table meowster-table |
When asked for the version, accept the suggested default: 1.0-SNAPSHOT, and press enter.
When asked to confirm the properties configuration, press enter.
(3) Modify the pom.xml file to mark the module as an ONOS app:
| Code Block |
|---|
$ cd meowster-table
$ vi pom.xml |
(3a) Change the description:
| Code Block |
|---|
<description>Meowster Sample ONOS Table-View App</description> |
(3b) In the <properties> section, change the app name and origin:
| Code Block |
|---|
<onos.app.name>org.meowster.app.table</onos.app.name>
<onos.app.origin>Meowster, Inc.</onos.app.origin> |
Everything else in the pom.xml file should be good to go.
Import into IntelliJ, if you wish
You can import the application source into IntelliJ, if you wish. We will assume that you have already created a new project for the Custom-View App, and want to add the Table-View App as an additional module:
In Project Settings, in the Modules section, select "add" (the + icon) and Import Module...
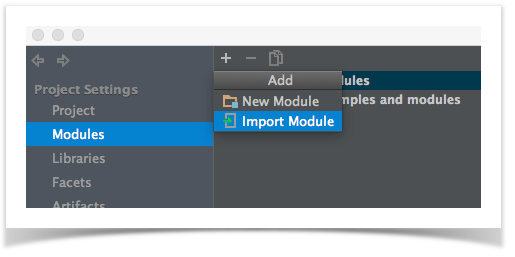
Navigate to and select the pom.xml file...
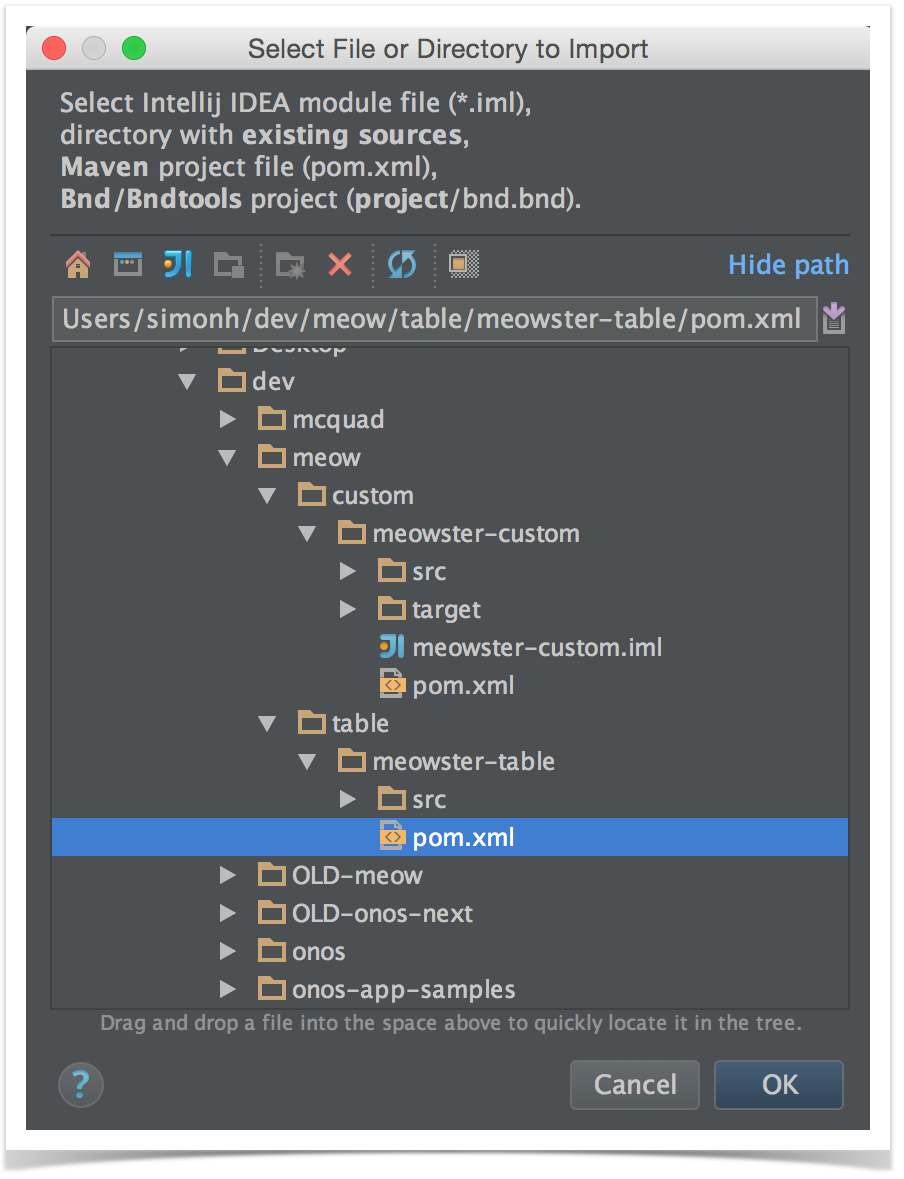
Import the module...
Now in the project structure, you should see something like this:
...
Note that we already updated the pom.xml file in the previous tutorial, it should be good to go as is.
New files in the IntelliJ Project
You should see a number of new files added to the project:
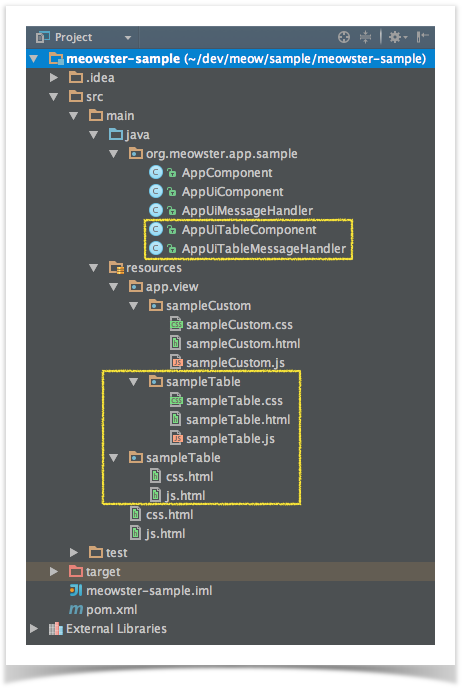
Specifically:
- New Java classes AppUiTableComponent and AppUiTableMessageHandler
- New directory ~/resources/app/view/sampleTable, containing:
- sampleTable.css
- sampleTable.html
- sampleTable.js
- New directory ~/resources/sampleTable, containing:
- css.html
- js.html
Building and Installing the App
From the top level project directory (the one with the pom.xml file) build the project:
| Code Block |
|---|
$ cd meowster-sample $ mvn clean install |
Assuming that you have ONOS running on your local machine, you can install the app from the command line:
| Code Block |
|---|
$ onos-app localhost install! target/meowster-table-sample-1.0-SNAPSHOT.oar |
| Note |
|---|
If you still have the app installed from the custom view tutorial, you can "reinstall" instead:
$ onos-app localhost reinstall! target/meowster-sample-1.0-SNAPSHOT.oar |
After refreshing the GUI in your web browser, the navigation menu should have an additional entry:
...