Due to a ransomware attack, the wiki was reverted to a July 2022 version. . We apologize for the lack of a more recent valid backup.
This page is WIP –
Overview
Applications may provide what we call a "Topology Overlay" – a component that provides new behaviors to the GUI Topology View.

An overlay can:
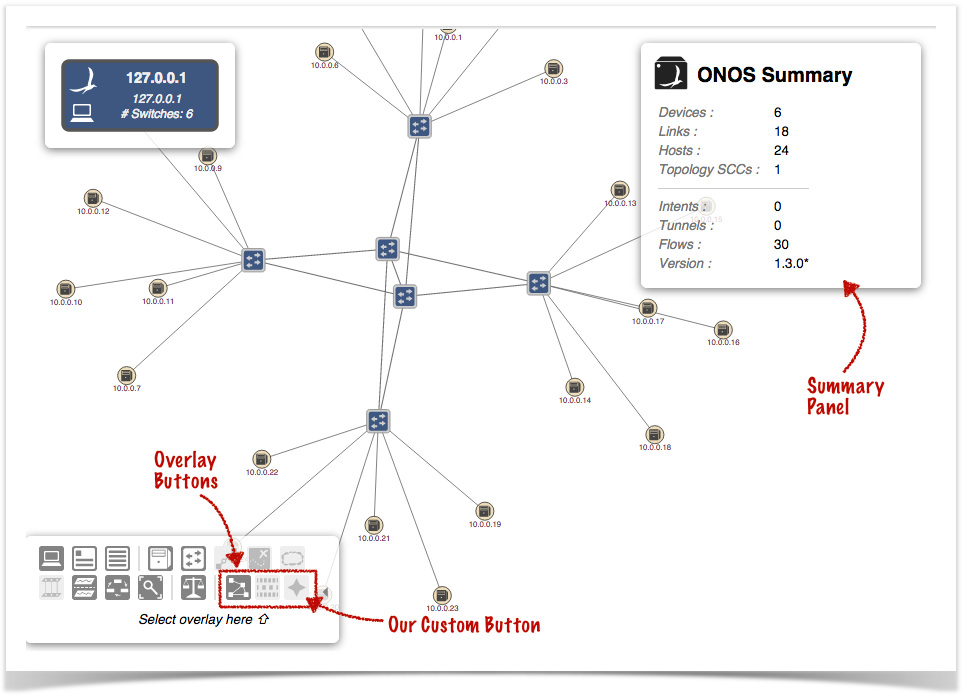
- augment or override the contents of the Summary Panel
- augment or override the contents of the Details Panel for a selected item
- cause links to be highlighted and/or labeled
- cause devices/hosts to be badged with numeric or iconic information
- provide toolbar buttons to allow the user to invoke new functions
This tutorial walks you through the steps of developing such a component.
Application Set Up
Setting up the application is exactly the same as for the Custom View tutorial, with one minor difference: the choice of archetype in step (2) should be uitopo instead of ui:
Currently, the uitopo archetype has not been implemented, so the following command will not work until this has been fixed.
(2) Overlay the UI additional components
$ onos-create-app uitopo org.meowster.app meowster-app
Building and Installing the App
From the top level project directory (the one with the pom.xml file) build the project:
mvn clean install
Assuming that you have ONOS running on your local machine, you can install the app from the command line:
onos-app localhost install! target/meowster-app-1.0-SNAPSHOT.oar
After refreshing the GUI in your web browser, the Topology View toolbar should have an additional overlay button:
Pressing our overlay button will activate the overlay (invoking "activate" callbacks both on the client side and server side) and insert our custom action buttons in the toolbar.
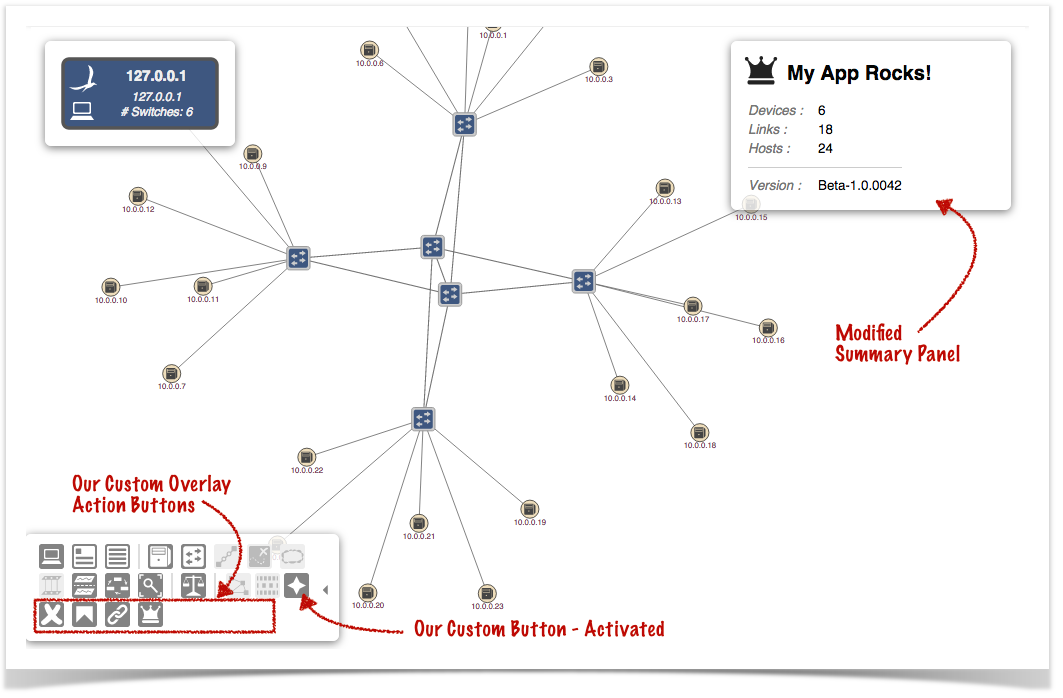
Note also that key bindings for our action buttons are listed in the Quick Help dialog, while our overlay is active:

Pressing an alternate overlay button will deactivate the overlay (invoking "deactivate" callbacks both on the client side and server side).
Overlays in Brief
To create a topology overlay requires both client-side and server-side resources; the client-side consists of JavaScript files (and possibly CSS), and the server-side consists of Java classes.
- The JavaScript defines and registers the overlay code with the topology view, providing callback functions for when certain events take place.
- The CSS (if needed) can provide custom styling.
- The server-side Java code provides the back-end support for deciding how to highlight the topology when needed, and how to customize the summary and detail panels.
Description of the Template Files - Server Side
These files are under the directory ~/src/main/java/org/meowster/app.
The exact path depends on the groupId (also used as the Java package) specified when the application was built with onos-create-app.
The following subsections describe the salient features of each file...
AppComponent
This is the base Application class and may be used for non-UI related functionality (not addressed in this tutorial).
AppUiComponent
This is the base class for UI functionality. The code is similar to the Custom View tutorial, but has a couple of subtle differences.
AppUiMessageHandler
This class extends UiMessageHandler to implement code that handles events from the client.
todo
AppUiTopoOverlay
This class extends UiTopoOverlay to implement server-side callbacks.
todo
DemoLink
This class extends BiLink to facilitate collation of information about links, prior to determining how the links should be highlighted.
todo
DemoLinkMap
This class extends BiLinkMap<DemoLink> to provide a concrete class for collating DemoLink instances.
todo
Description of the Template Files - Client Side