Due to a ransomware attack, the wiki was reverted to a July 2022 version. . We apologize for the lack of a more recent valid backup.
1. Environment Setup
If you already know about ODTN emulators, you can directly go to step 1.1. Otherwise, you can read about ODTN emulators in this link: ODTN Emulators
1.1 Firstly, start two Cassini transponder emulator and one tapi-2.1 OLS emulator via Docker.
docker pull onosproject/tapi-2.1:0.01
docker pull onosproject/oc-cassini:0.21
docker run -it -d --name odtn-emulator_openconfig_cassini_1_1 -p 11002:830 onosproject/oc-cassini:0.21
docker run -it -d --name odtn-emulator_openconfig_cassini_2_1 -p 11003:830 onosproject/oc-cassini:0.21
docker run -it -d --name odtn-emulator_tapi_ols_1 -p 11000:1234 onosproject/tapi-2.1:0.01
Optionally, check if these three emulators run successfully.
We need to create a XML file named get-terminal-device.xml as below:
<?xml version="1.0"?>
  <get xmlns="urn:ietf:params:xml:ns:netconf:base:1.0">
    <filter xmlns:td='http://openconfig.net/yang/terminal-device'>
      <td:terminal-device/>
    </filter>
  </get>
And then use these three commands to test the emulators respectively.
netconf-console --host=127.0.0.1 --port=11002 -u root -p root --rpc=get-terminal-device.xml
netconf-console --host=127.0.0.1 --port=11003 -u root -p root --rpc=get-terminal-device.xml
curl http://localhost:11000/restconf/data/tapi-common:context
1.2 Secondly, start ONOS locally with application 'odtn-service' and 'roadm'
cd ${ONOS_ROOT}
export ONOS_APPS=odtn-service,roadm,gui2
bazel build onos
bazel run onos-local -- clean
2. Topo discovery
2.1 device discovery
Create a JSON file named device.json as below:
{
  "devices" : {
    "netconf:127.0.0.1:11002" : {
      "basic" : {
        "name":"cassini2",
        "driver":"cassini-ocnos"
      },
      "netconf" : {
        "ip" : "127.0.0.1",
        "port" : "11002",
        "username" : "root",
        "password" : "root",
        "idle-timeout" : "0"
      }
    },
    "rest:127.0.0.1:11000": {
      "rest": {
        "ip": "127.0.0.1",
        "port": 11000,
        "protocol": "http",
        "testUrl":"/restconf/data/tapi-common:context",
        "manufacturer": "tapi-swagger",
        "hwVersion": "0",
        "swVersion": "2.1"
      },
      "basic": {
        "driver": "ols"
      }
    },
    "netconf:127.0.0.1:11003" : {
      "basic" : {
        "name":"cassini1",
        "driver":"cassini-ocnos"
      },
      "netconf" : {
        "ip" : "127.0.0.1",
        "port" : "11003",
        "username" : "root",
        "password" : "root",
        "idle-timeout" : "0"
      }
    }
  }
}
And then use command "onos-netcfg localhost device.json" to push device info into ONOS.
2.2 link discovery
Create a JSON file named link.json as below:
{
  "links": {
    "netconf:127.0.0.1:11002/201-rest:127.0.0.1:11000/100000035178": {
      "basic": {
        "type": "OPTICAL",
        "metric": 1,
        "durable": true,
        "bidirectional": true
      }
    },
    "rest:127.0.0.1:11000/100000035182-netconf:127.0.0.1:11003/201": {
      "basic": {
        "type": "OPTICAL",
        "metric": 1,
        "durable": true,
        "bidirectional": true
      }
    }
  }
}
And then use command "onos-netcfg localhost device.json" to push link info into ONOS.
3 GUI2 View
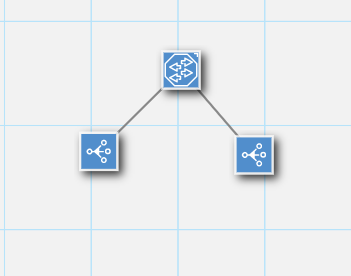
Now open the home (topology) page of ONOS:
Then open the roadm custom view page:
http://localhost:8181/onos/ui/#/roadm-gui
Select the device "netconf:127.0.0.1:11003":
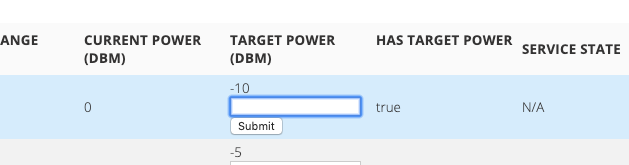
Click the icon on the top-right to see the port details (http://localhost:8181/onos/ui/#/roadm-gui/roadm-port-gui?devId=netconf:127.0.0.1:11003):
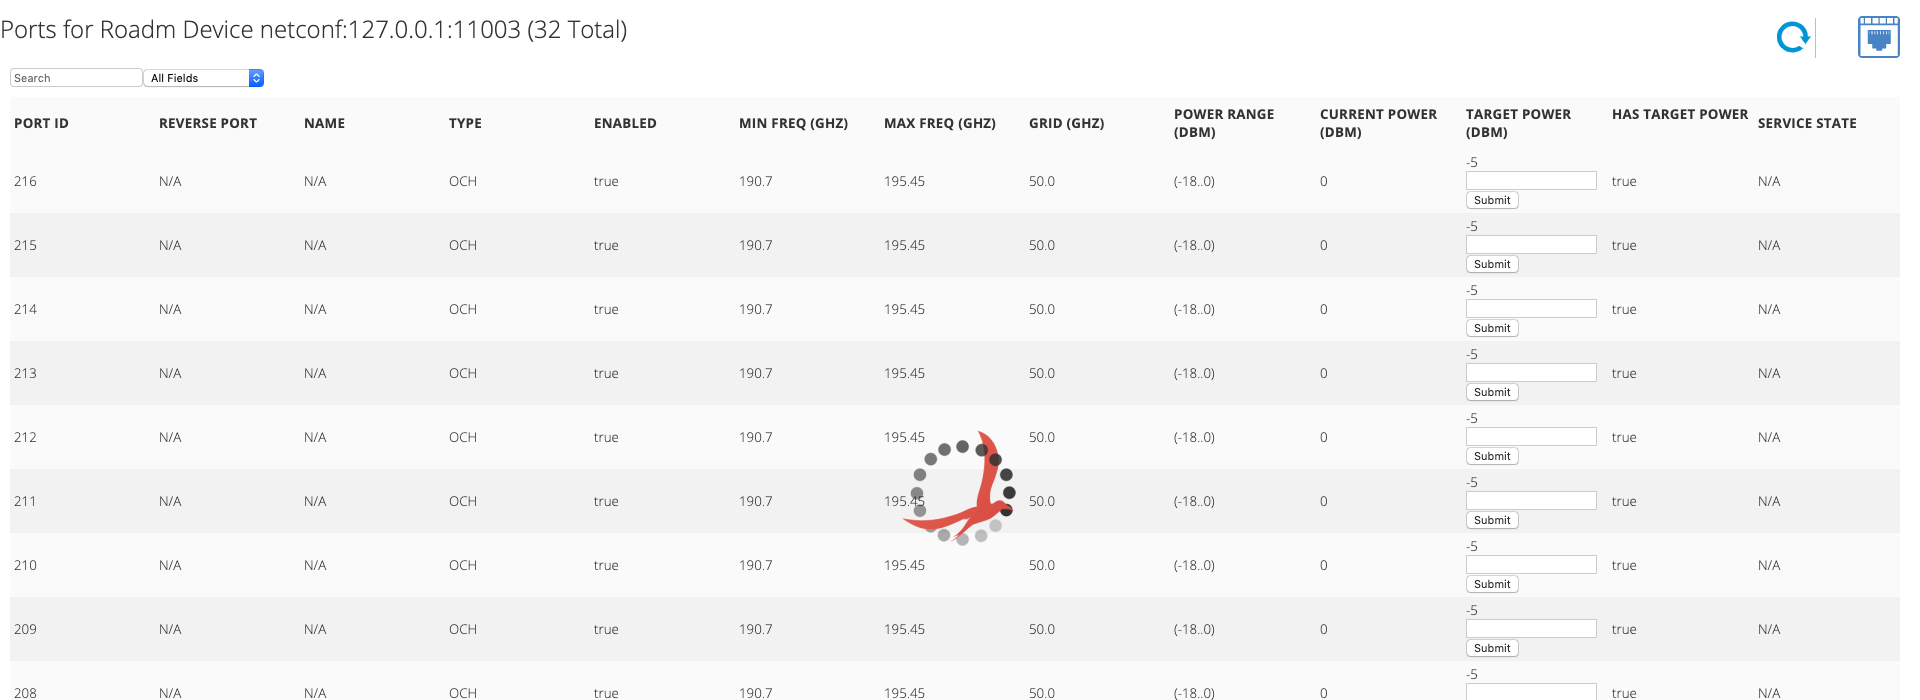
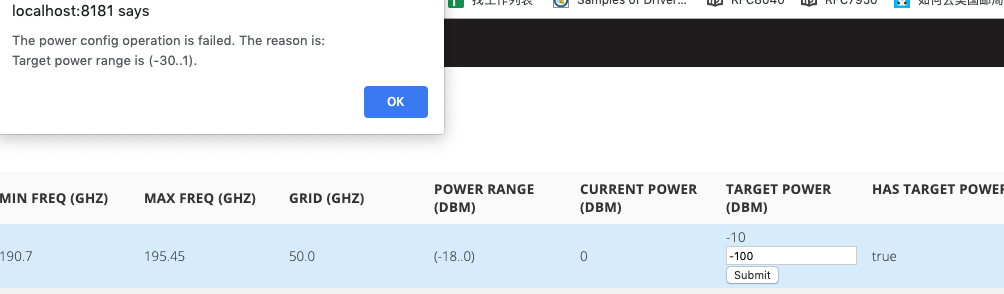
On the TARGET POWER column, we can type in the power value to modify the power of specific port:
However, if the value is out of the available range, the alert appears: