Due to a ransomware attack, the wiki was reverted to a July 2022 version. . We apologize for the lack of a more recent valid backup.
This section describes how to set up the environment used for the testing and development of the packet optical use case. In specific, it will outline the steps needed to install and start the software required to emulate a packet/optical network, and the ONOS instance(s) used to control them.
Overview
One of the key drivers for this use case is that network designers can spin up a relatively large emulated packet-optical network on their personal computer, and develop applications without relying on a hardware optical network, which may be expensive and/or difficult to come by.
Mininet is the emulation tool that will create all network switches, links, and hosts. The forwarding behavior of the switches is controlled by ONOS using the OpenFlow protocol. The packet switches are based on Open vSwitch and use OpenFlow 1.0, while the optical switches rely on LINC-OE and use OpenFlow 1.3 (with vendor extensions as defined by the Optical Transport Working Group in ONF).
Installation
The following are the necessary steps to install the required software to emulate a multi-domain network as described above. The setup assumed here is:
- A host for emulating a multilayer network with Mininet and Linc-OE
- One or more hosts running an ONOS instance each
- A deployment host where the ONOS images are built, and deployed from, onto the ONOS hosts
A common way to realize the above is to host the Mininet and ONOS hosts as VM (or container) guests on the deployment host. The minimum requirement is that all hosts above be able to communicate with one another, and have Internet connectivity.
Mininet
The steps here are based on the instructions for installing Mininet natively found here. These instructions assume that the platform is Ubuntu 14.04, x86_64, and a user:password of mininet:mininet has been set up.
Install required packages.
sudo apt-get update
sudo apt-get install erlang git-core bridge-utils libpcap0.8 libpcap-dev libcap2-bin uml-utilities curl vlan
Patch and install Mininet. This is required to enable CPqD switches to connect to multiple controllers.
cd
git clone git://github.com/mininet/mininet
cd mininet
wget 'https://wiki.onosproject.org/download/attachments/4164175/multi_controller.patch?version=1&modificationDate=1443649770762&api=v2' -O multi_controller.patch
git apply multi_controller.patch
sudo ./util/install.sh -3fnv
# role back CPqD to a version known to work
cd
cd ~/ofsoftswitch13/
make clean
git reset --hard 8d3df820f7487f541b3f5862081a939aad76d8b5
sudo make install
cd
sudo mn --test pingall # this should work
Install Linc-OE
cd
git clone https://github.com/FlowForwarding/LINC-Switch.git linc-oe
cd linc-oe
sed -i s/3000/300000/ rel/files/vm.args
cp rel/files/sys.config.orig rel/files/sys.config
make
cd
git clone https://github.com/FlowForwarding/LINC-config-generator.git
cd LINC-config-generator
cp priv/* .
make
Configure an ONOS development environment. This is required for the Linc-OE portion of the network emulation.
cd
git clone https://github.com/opennetworkinglab/onos
printf '%s\n' '. onos/tools/dev/bash_profile' >> .profile
. .profile
For convenience, set up a cell setting the OC variables to the IPs of the clusters.
vicell -a -c optical
This opens a new file in the default editor for your environment (set by the
EDITORenvironment variable, which, if unset, will causevicellto usevi.vicell -e <editor>will set the preference to <editor>). Saving this file will create a cell configuration named 'optical', and load the settings defined in it. A sample cell file might look like the following:export ONOS_NIC=192.168.64.* export OC1="192.168.64.45" # ONOS instance 1 export OC2="192.168.64.46" # ONOS instance 2 export OC3="192.168.64.47" # ONOS instance 3 export OCI=$OC1 # default instance set to instance 1
The addresses and the number of OC lines above should be changed according to the number of ONOS instances, and address allocation for each.
ONOS
Step 1 applies to both deployment and ONOS hosts. The rest only apply to the deployment host.
- Install dependencies as per the Prerequisites section in Installing and Running ONOS.
Get ONOS and sample application sources and build them.
git clone https://github.com/opennetworkinglab/onos
cd onos
mvn install -DskipTests -Dcheckstyle.skip
cd ..
git clone https://github.com/opennetworkinglab/onos-app-samples
cd onos-app-samples
mvn install
Create and apply a cell environment for the ONOS cluster as in Step 5 of the previous section. It should specify
onos-app-opticalandonos-app-proxyarp(oronos-app-fwd) as a required applications by exporting the valueONOS_APPS.export ONOS_NIC=192.168.64.* export OC1="192.168.64.45" # ONOS instance 1 export OC2="192.168.64.46" # ONOS instance 2 export OC3="192.168.64.47" # ONOS instance 3 export OCI=$OC1 # default instance set to instance 1 export ONOS_APPS="drivers,openflow,proxyarp,optical"
The addresses in this cell file should mirror those in the Mininet environment's cell file.
Deployment
Deploy the ONOS instance(s). From the deployment host:
op && onos-install -f
Start the network emulation. The ONOS source tree comes with two example scripts that create a multi-layer topology. These can be found in
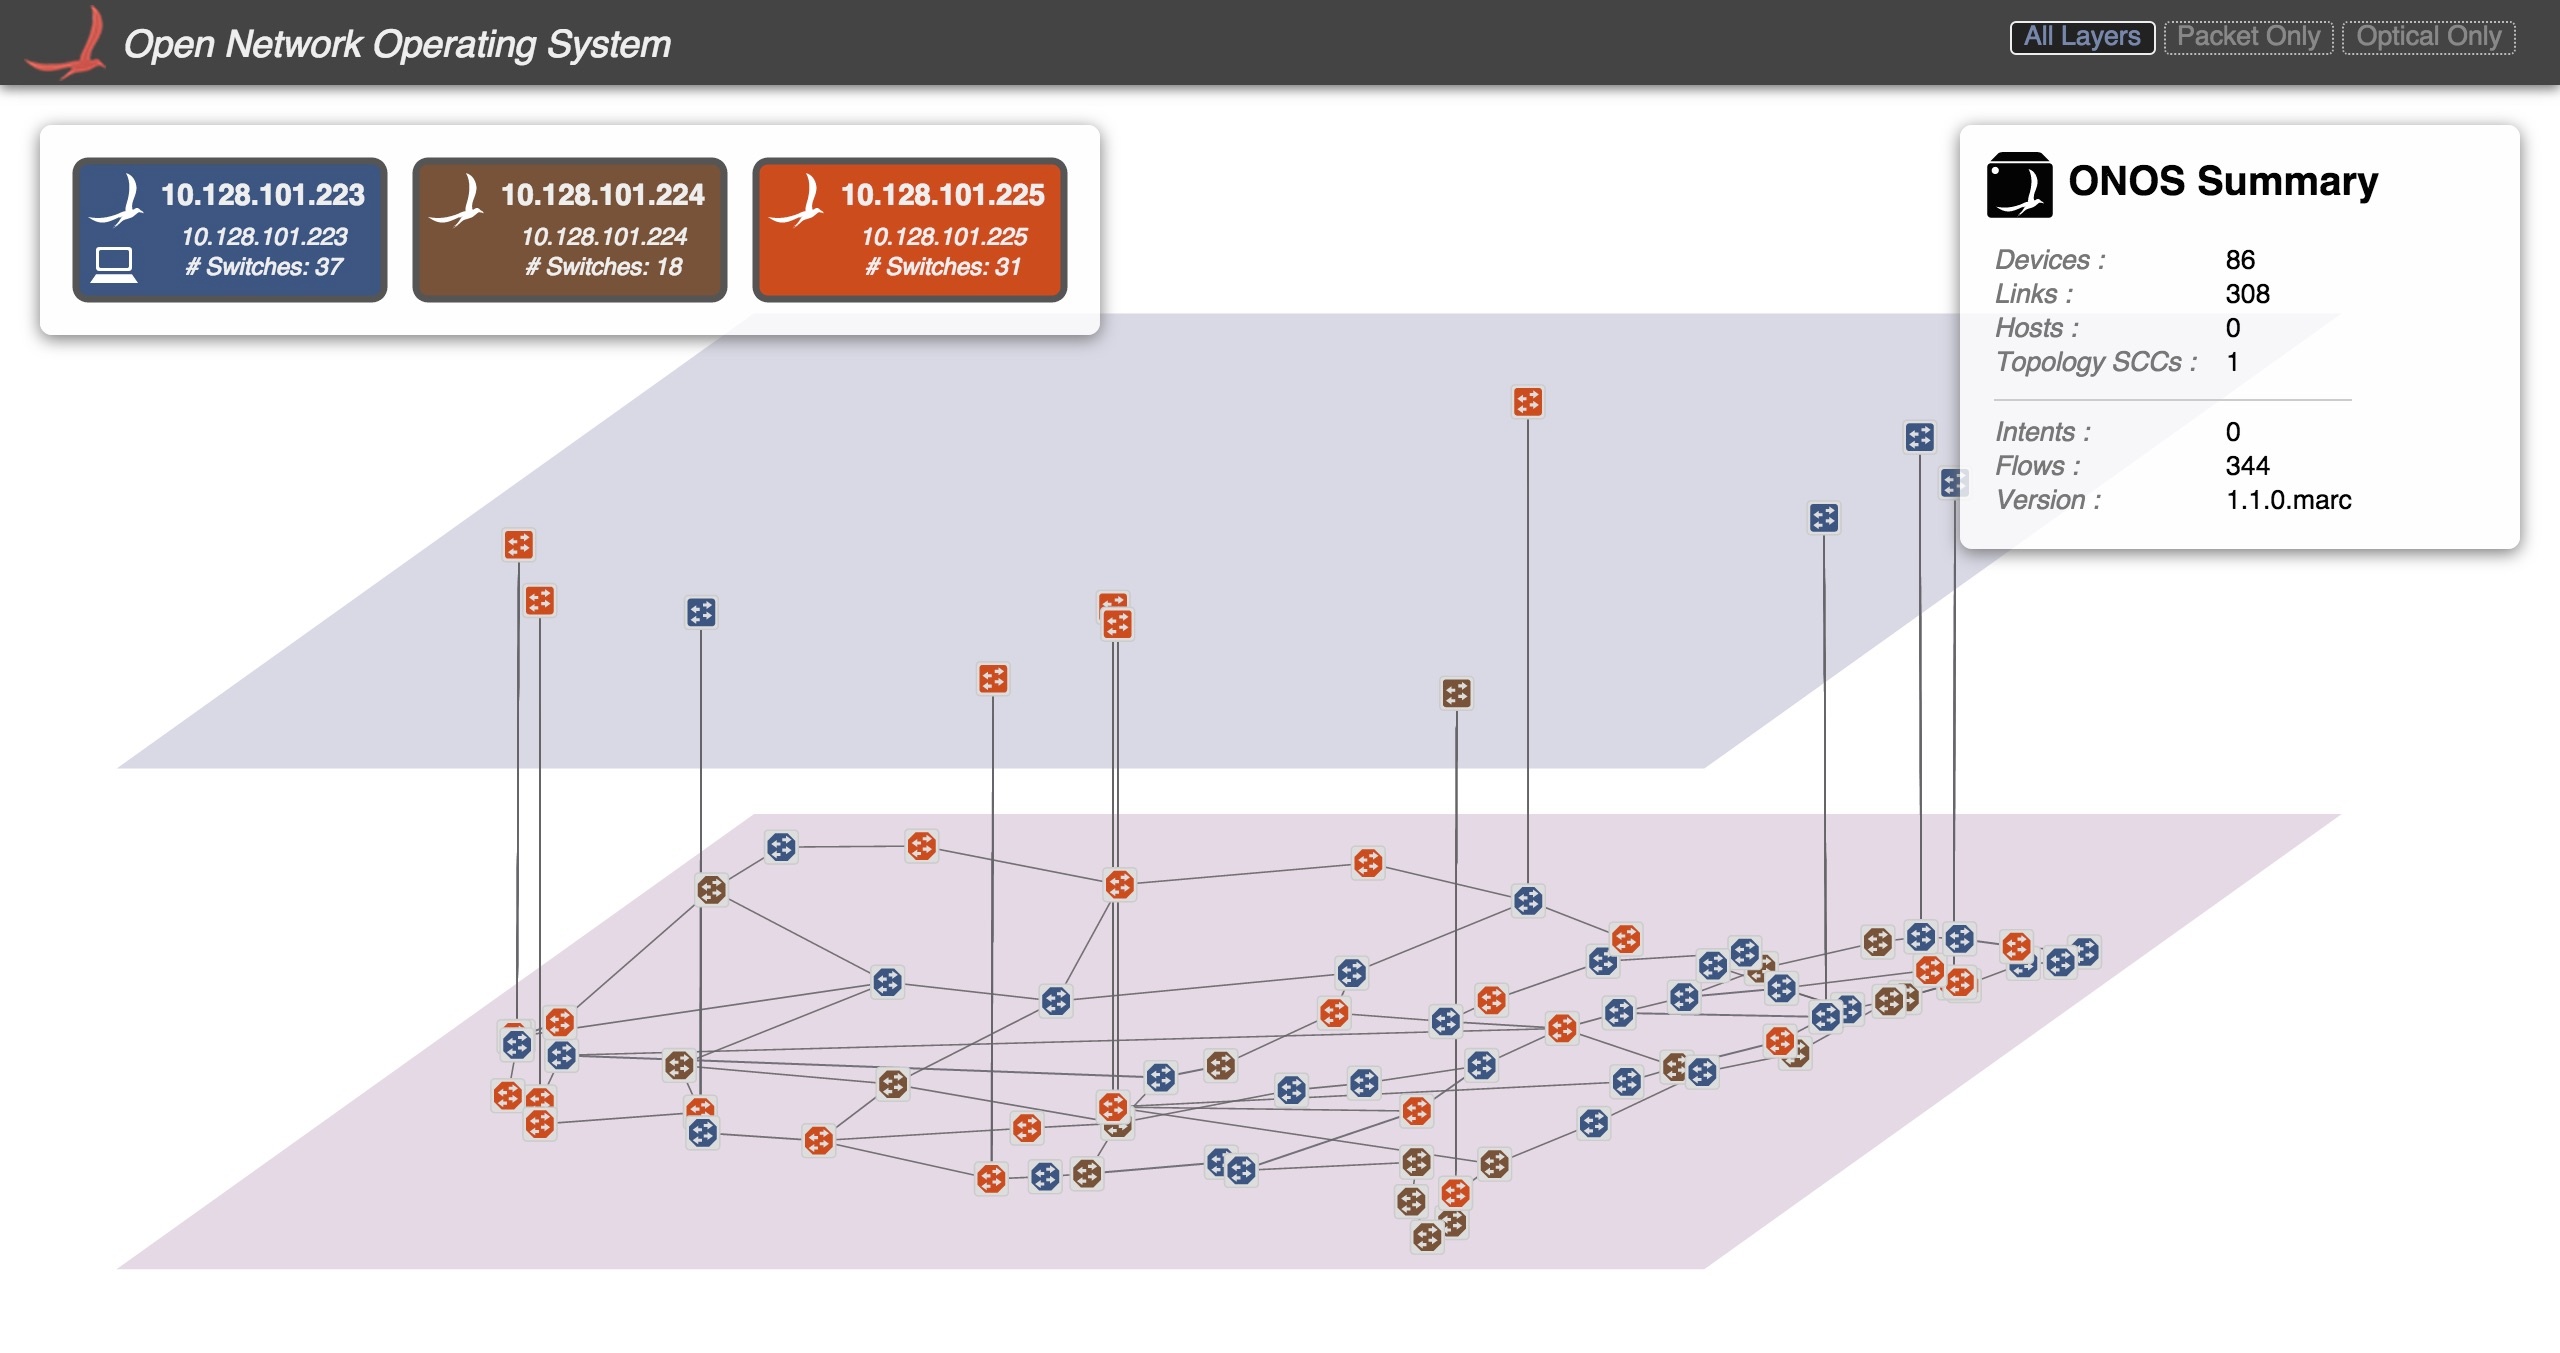
onos/tools/test/topos/and are calledopticalTest.pyandopticalTestBig.py. Try running either; For example, to create spawn a large packet-optical topology, run the following command (note the-Eparameter passed tosudowhich preserves the environment variables) from the Mininet host:$ sudo -E python onos/tools/test/topos/opticalTestBig.py $OC1 $OC2 $OC3
The above command uses the three ONOS instances defined in the cell file that has been set up and applied in the Mininet environment. Specifically this ensures that all switches (both packet and optical) will be configured to use the listed instances as their OpenFlow controller(s).
If, for some reason, the script fails to inject the optical topology in ONOS, you can re-run this step as follows:
$ ~/onos/tools/test/bin/onos-topo-cfg $OC1 Topology.json
If you get 404 responses back, you should check that you have onos-rest (not to be confused with onlab-rest) loaded as well.
LINC Cheat Sheet
You can attach to the console of a running LINC instance as follows:
$ sudo linc-oe/rel/linc/bin/linc attach
In the LINC console, the following commands are available. Please note that Erlang is very picky regarding syntax, so make sure you are not missing any spaces or the dot ('.') at the end of each command!
| Command | Description |
|---|---|
| Get running config |
linc_logic:get_datapath_id(SwitchId). | Get DPID of logical switch |
linc:stop_switch(SwitchId). | Stop logical switch |
| Disable port |
linc:port_up(SwitchId, PortId). | Enable port |
linc:ports(SwitchId). | List ports on logical switch |
linc_us4_oe_flow:get_flow_table(switchId, tableId). | Get flow table of logical switch (use tableId 0) |